USB devices control
Block USB devices
To block all flash drives you should edit the current configuration. Open “Admin -> Control panel -> Computer configurations” and choose the configuration. Switch tab to “Devices (USB)” and make changes as: indicated on the screenshot below:
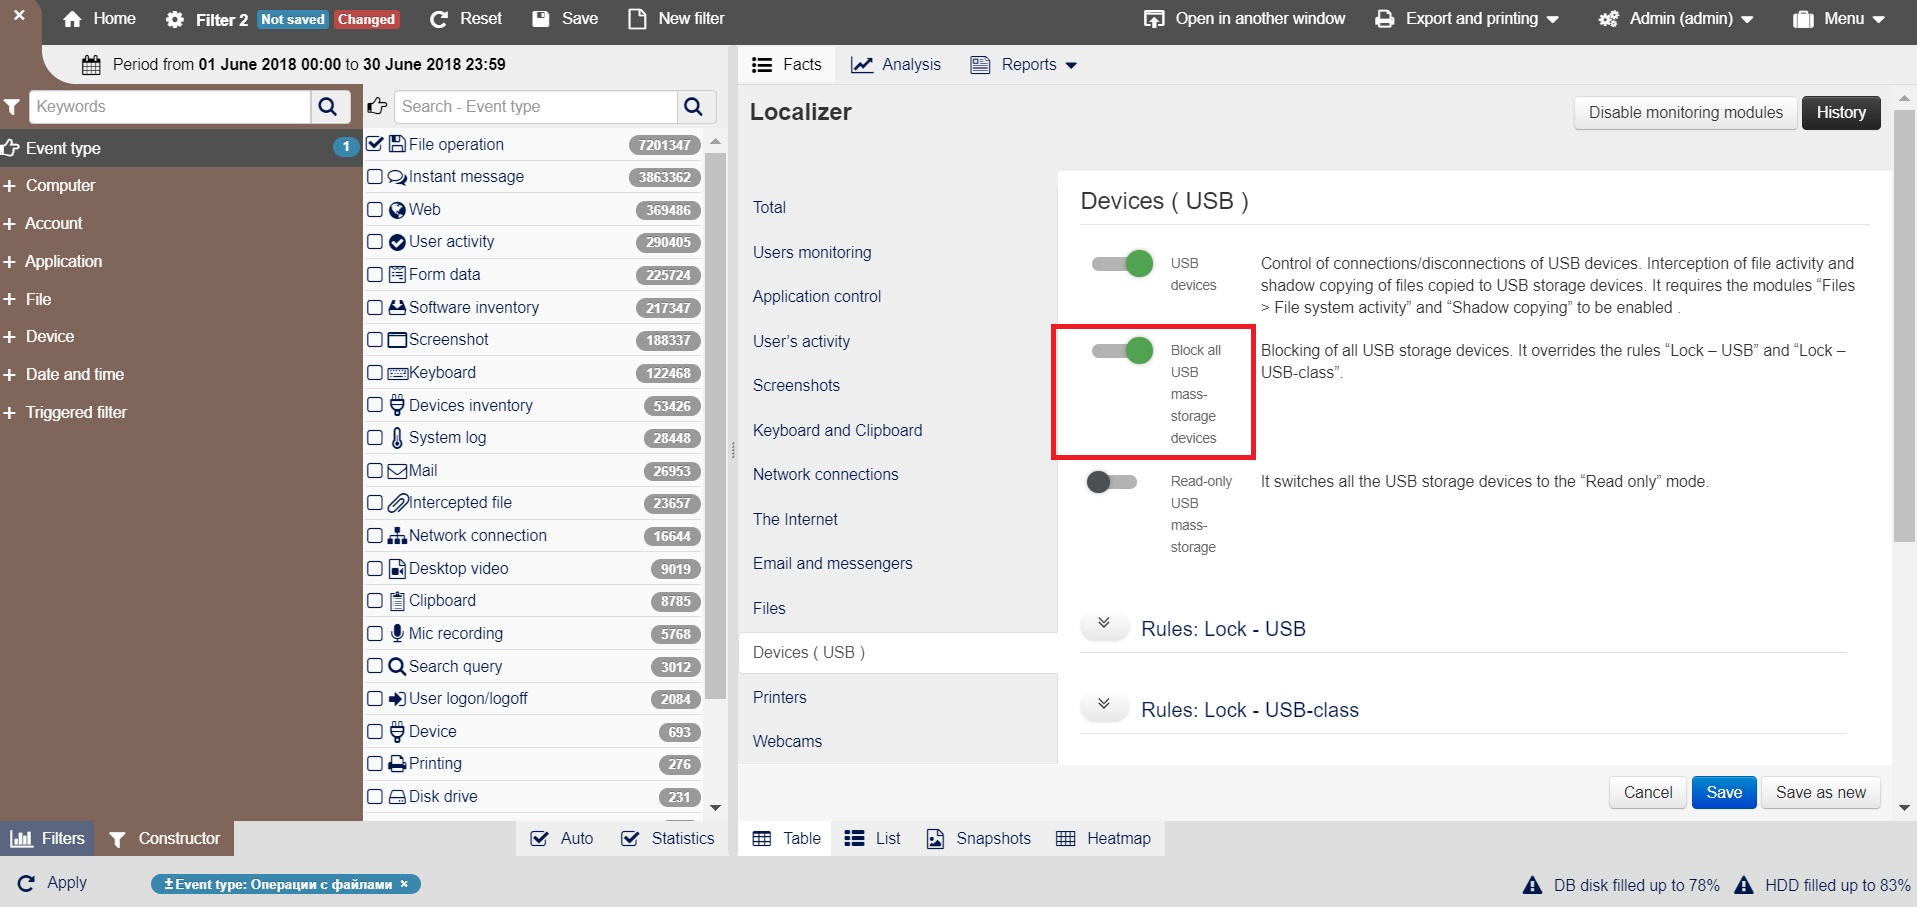
To block only certain devices, edit “Rules: Access - USB”

To block devices, enter the device ID in the “Block” field. When you enter the ID, a drop-list of all the devices ever connected to agents appears, you can select and add devices from the list. Save the configuration.
Note
With this configuration only the specified USB devices will be blocked, the rest of devices will work.
To block a class of devices, edit the “Rules: Access - USB-class”:

To block devices, enter the device class in the “Block” field. When you enter the class name, a drop-list of all the device classes ever connected to agents appears you can select and add device classes from the list. Save the configuration.
Note
Note
With this configuration only the specified classes of USB devices will be locked, the rest device classes will work.
Create a whitelist of USB devices
To create a whitelist of USB devices:
Define the complete list of ID devices that you want to whitelist.
Open “Admin” -> “Computer configuration” menu, select your configuration. Switch to tab “Devices (USB)”.
To create a whitelist, enter the device IDs in the “Allow” field. When you enter the ID, a drop-list of all the devices ever connected to agents appears, you can select and add devices from the list.
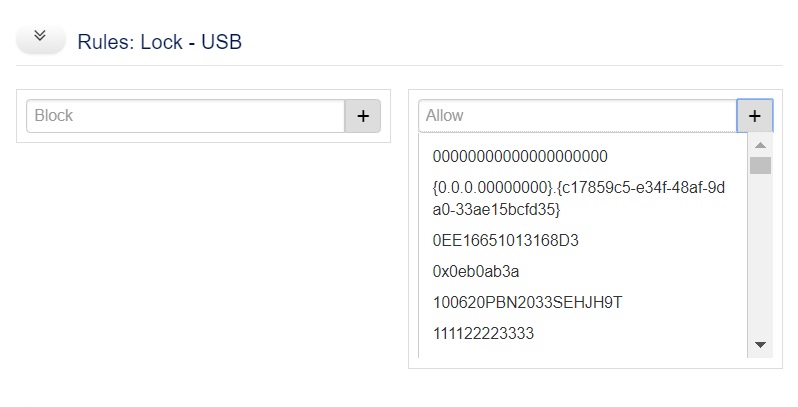
To create a whitelist enter the device IDs in the “Allow” field. When you enter the ID, a drop-list of all the devices ever connected to agents appears, you can select and add devices from the list.
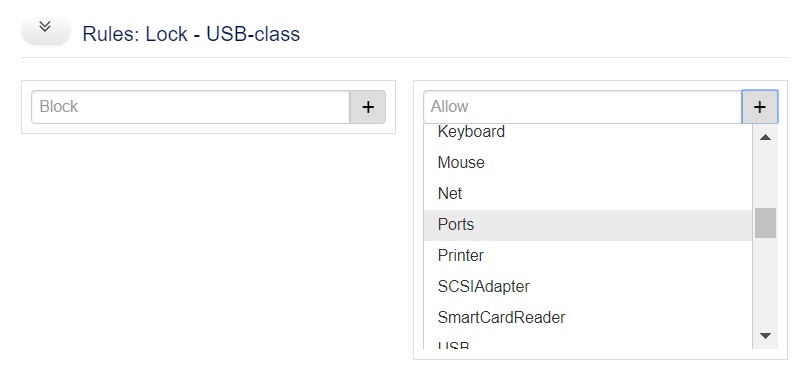
Add the device classes that should not be locked to this rule.
Save the configuration.
Warning
All devices and device classes that are not whitelisted will be locked!
Define USB Device ID
Defining ID using Staffcop Enterprise
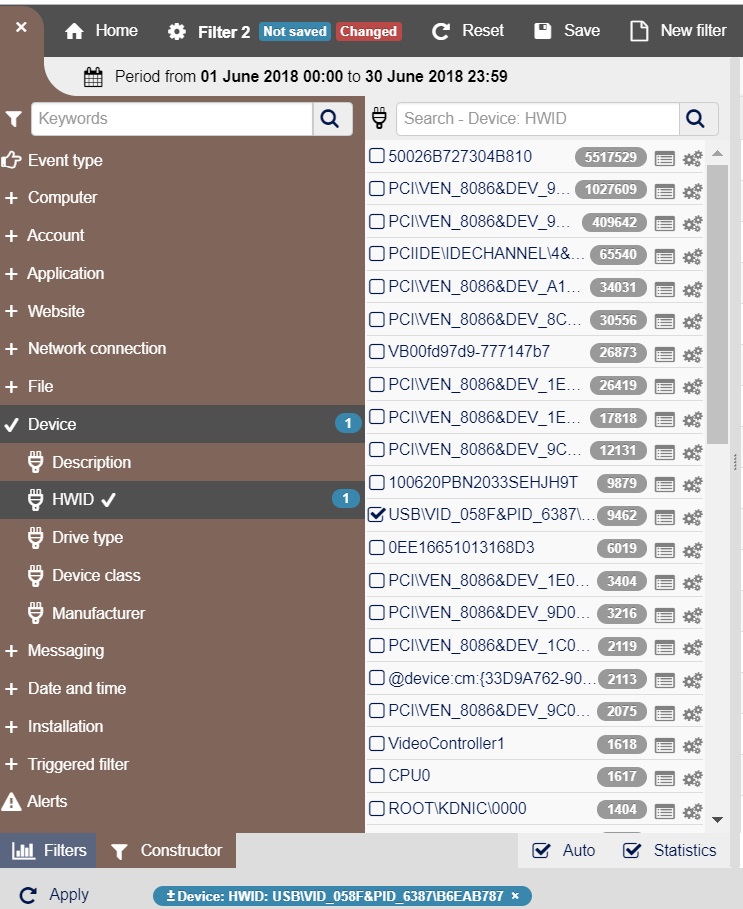
You can define the ID of the USB device for blocking or whitelisting in the web console interface:
Open “Constructor”, select the PC with the connected USB device .
Select the “Device - > Drive type -> Removable” dimension (for removable USB devices).
Select “Device -> HWID” to see ID of all devices connected to the selected PC.
Defining ID using standart Windows tools
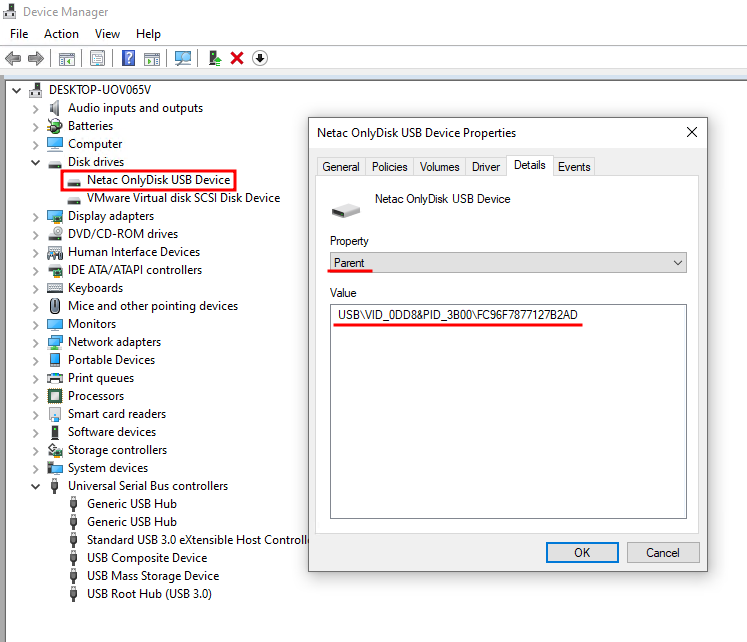
Launch Device Manager.
In the Disk Drivers section find connected flash drive and open its Properties.
On the Details tab select the Parent property.
The ID of the flash drive (HardwareID) will be displayed in the Value field.
Alternative option:
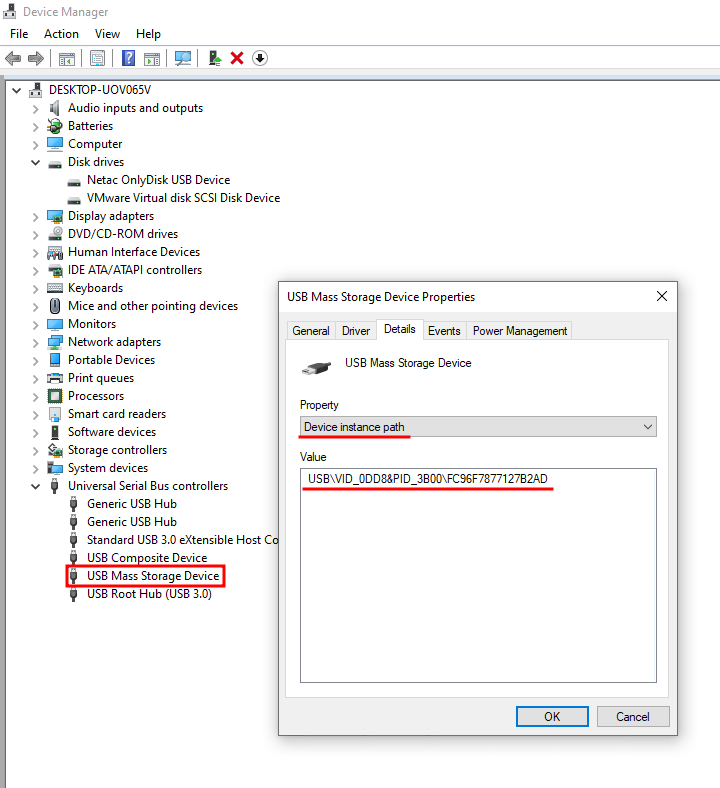
Launch Device manager.
In the USB controllers section find USB Mass Storage device (the name may vary).
Open the Properties window.
On the Details tab select the property Device Instance Path.
The Value of this item is the ID of the USB device (HardwareID).
“Read only” mode for USB-devices
To switch all USB devices to the “Read Only” mode, you need to edit the current configuration in the web console.
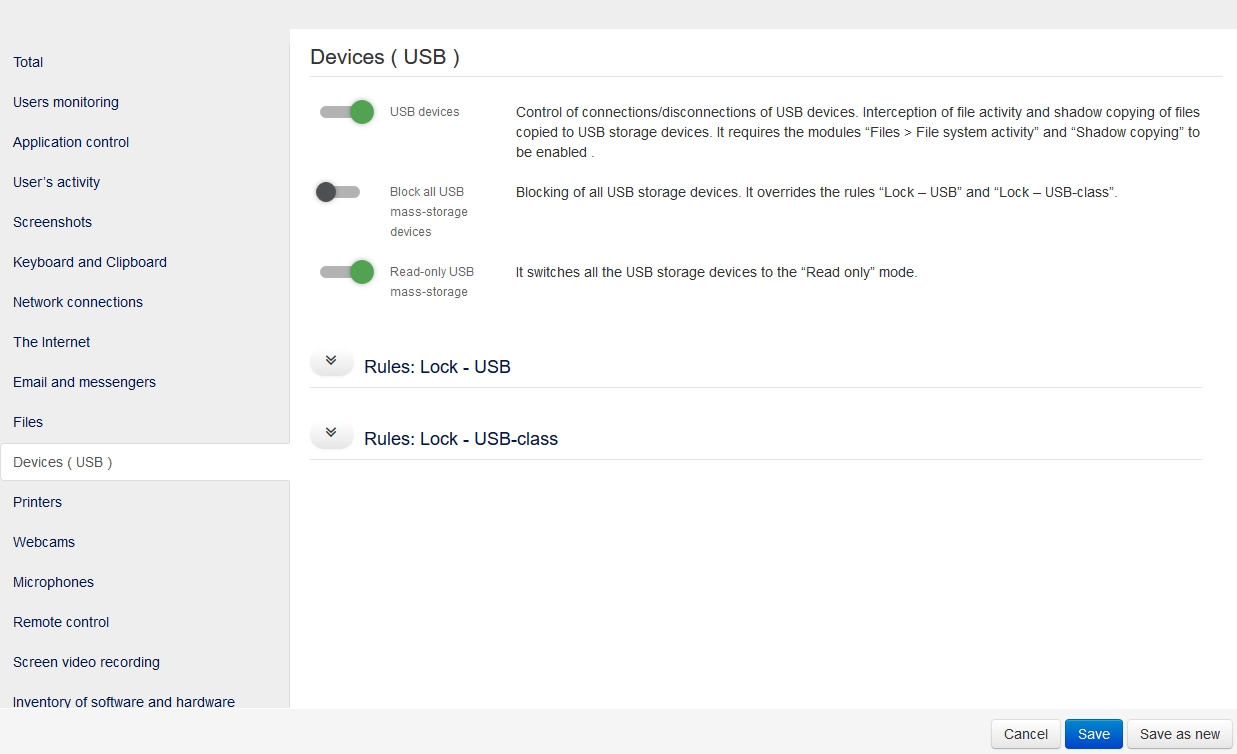
Open “Admin -> Control panel -> Agent Configuration” menu, select your configuration. Switch to “Devices (USB)” settings and configure them as on the screenshot below, then save the configuration:
