Quick Start
Before installing the Staffcop Enterprise server, make sure your hardware meets the system requirements.
After the server is installed:
Log in to the Linux console using the credentials you set during installation.
Run the following command to find your IP address:
ip a
Open Mozilla Firefox or Google Chrome and enter the IP address shown in the
inetline into the browser’s address bar.
Activate License and Open the Admin Interface
When you log in to the web console for the first time, you’ll be prompted to create a password for the admin user.
Create the password using letters and figures, then click Change password.
To reset a forgotten password, run the following command in Ubuntu:
sudo staffcop passwd NEW_PASSWORD
When you see the authentication form, follow these steps:
Enter admin as the username and the password you’ve just created
For a trial version, check the Trial Version box and provide your email address.
If you have a registration key, enter it in the Key field and click Activate.
Once registered, the Staffcop server’s web interface will open via HTTPS.
Note
If you’re using Chrome with a dark theme enabled in chrome://flags/ → forced_dark, switch to the Light or Classic theme in the Menu (Admin) → Theme section for optimal display.
Offline Activation
To request a trial key:
Email sales@staffcop.ru.
Once you receive the key, enter it into the registration form and click Offline Activation.
Save the certificate request as a text file.
Email the file to support@staffcop.ru with the subject line “Offline Activation”.
See also
Step-by-step instruction Key Activation.
Network Settings
Network settings depend on where the agent and server are located:
Same subnet: No additional configuration is required.
Different subnets: Ensure network gateways don’t block the following ports:
TCP: 80
TCP: 443
TCP: 22
TCP: 445
UDP: 137
UDP: 138
UDP: 139
TCP: 445
TCP: 9090
Different networks over the Internet: Connect the agent to the server from an external network.
The server uses port 443 for secure HTTPS connections. To check if the server is accessible, open the web console in a browser on the agent machine at https://external_ip:443.
If you’re using a VPN, the setup is the same as for local networks. To change the server port, refer to:ref:Change default 443 port<faq_changeport>.
Agent Monitoring Setup
After installing the endpoint, the agent automatically registers with the Staffcop Enterprise server provided that licenses are available and auto-assignment is enabled.
To check registration:
Open the web console.
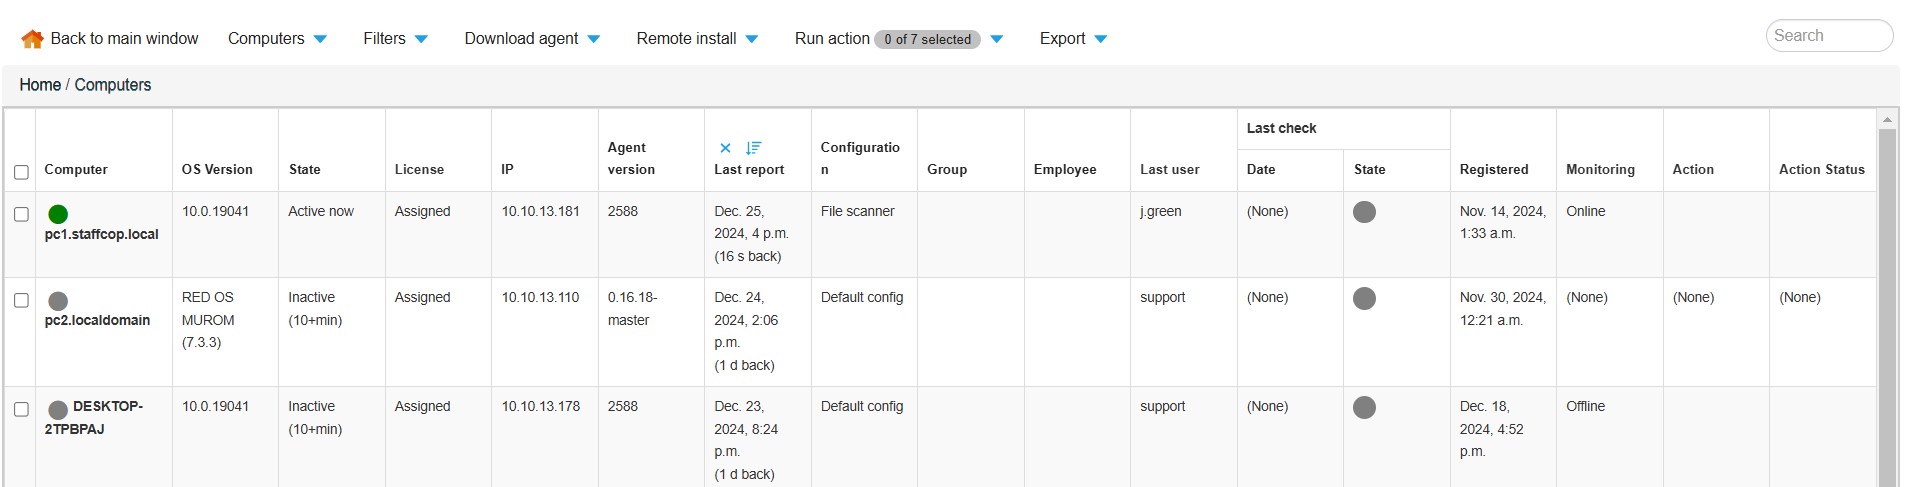
Go to Control Panel → Computers.
Search for the new agent in the list. Its name will match the PC name where it’s installed. If you see an empty entry you should wait a bit, as registration may take up to 5 minutes.
The list of agents should look like that:
Assigning Configuration
By default, new agents are assigned the Default Configuration. This configuration enables the agent to monitor events on the user’s workstation.
The Default Configuration includes:
Tracking work hours based on activity in applications and websites.
Recording keystrokes (keylogger).
Collecting user login information.
Capturing screenshots every 5 minutes.
You can switch to a different configuration to better suit your needs.
Changing the Configuration
The Default Configuration is optimized for performance. If you need to monitor all user activities, assign the Total Control configuration to the agents:
Navigate to Control Panel → Computer Configuration.
Select Total Control from the configuration list.
Find the Assign agents tab on the left sidebar.
Using the navigation buttons you can assign configuration to agents. For example, click the Choose all in Available agent button to transfer them to the column Chosen agents. Double-click on an angent to move it to the list.
Save your changes.
The new settings will apply within 3—5 minutes.
See also
You will find more details in How to Change the Configuration.
Troubleshooting Full Control Configuration
Antivirus Exclusions Not Set Up
If you run into issues after switching to Full Control, here are a few things to check:
Performance or Network Resource Issues
If you experience performance issues or network resource unavailability on the PC with the agent:
- Switch the agent to the Default Configuration.
- Review the setup instructions or contact support for help.
For more details on configuring the agent, see Computer Configuration.
Time Settings
If data shows incorrect timestamps, double-check that both the agent and server are using the correct timezone.
Other issues
For any other issues, reach out to technical support. If necessary, you can revert the agent to the Default Configuration and review the setup instructions.
You can find more detailed instructions in Computer Configuration.
Working with Collected Data
Before getting started, take a moment to explore the interface’s core elements, such as the Constructor and Policies tabs.
The Constructor Tab organizes data by dimensions like event type, user, computer, and network. You can save filter settings for easy access later. For more details, refer to the article Filter Navigation Panel.
Filters are user-defined objects created in the Constructor based on filter parameters. They represent custom dimensions within the Staffcop Enterprise web console.
The workflow is based on setting filters using checkboxes in the Constructor.
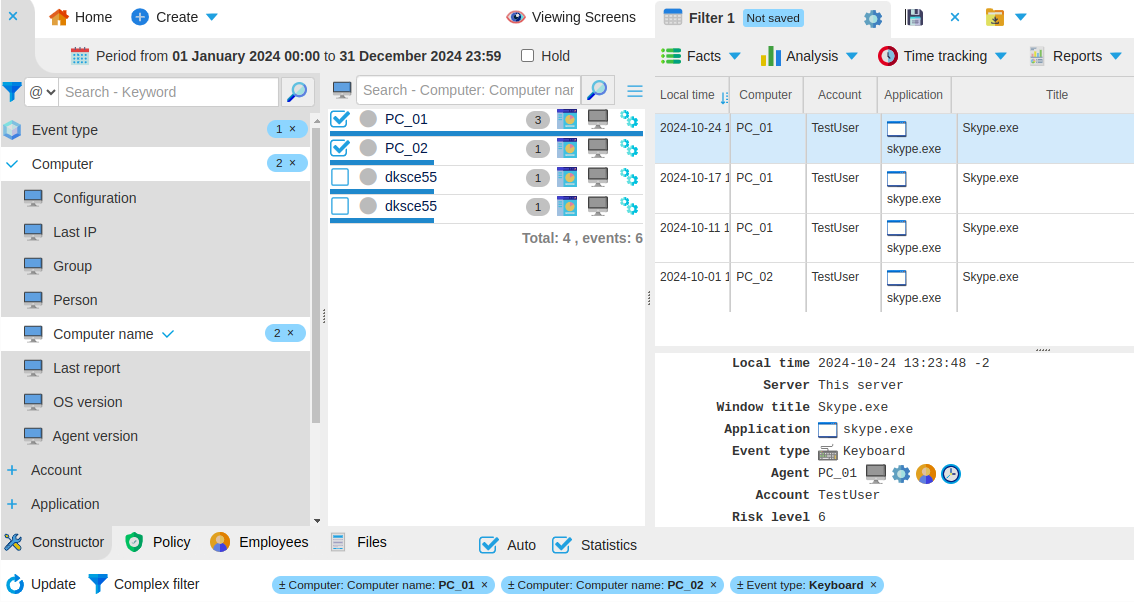
Let’s consider an example of working with data:
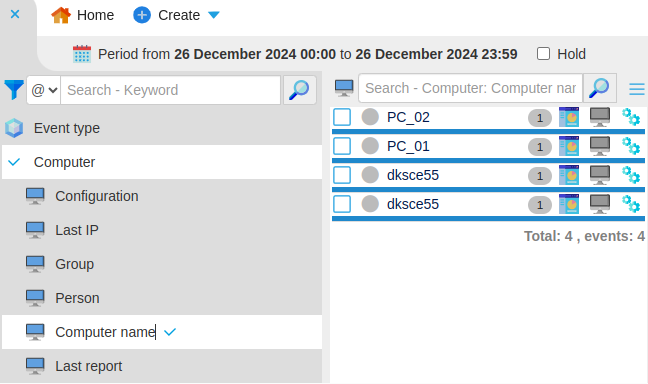
Open the Constructor tab.
Click the Event Type and set Keyboard as the event type. You may use the search bar to quickly find it.
Under the Computer name dimension, select the computer you would like to monitor.
In the Constructor menu, open Facts and switch to the Table view.
Click Save on the panel on the very top on the right and name your filter in the pop-up window.
Go to the Filters tab and select the filter you just saved.
In the Period panel, set the time range to filter events that occurred during this period.
As a result, the lower panel will display the filter parameters: Agent and Keyboard. The event table will now show only the Keyboard Input events for the selected agent.
Reports and Notifications
In the Lens, you can access two view modes:
Information : Displays items listed under the Events menu.
Reports: Used for generating report templates.
Use Cases
Exporting Website Visit Data
Let`s say, you need to export a table with website visit details for a specific user:
Open the Constructor tab and select Analysis.
Go to the Table tab.
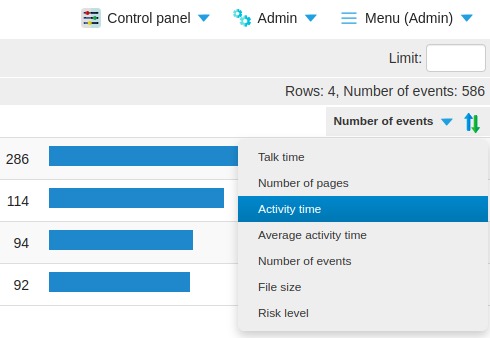
On the left dimension sidebar, choose Website → Domain.
On the right of the screen, below Menu, click the up-down triangle and select Activity Time. Hovering over the triangle shows Choice of Measure.
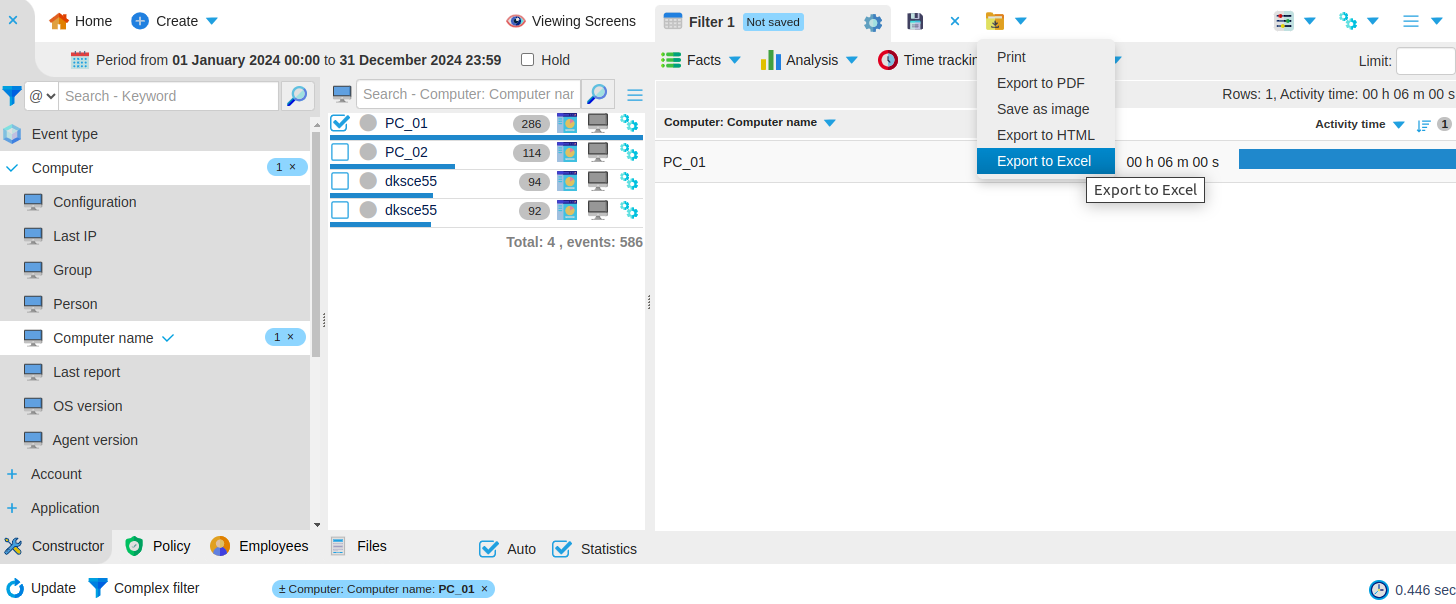
In the Constructor, select the Computer dimension, and then check the Agent’s PC.
Click Export and Printing on the right top.
Sending the Filtered Data
To have the filtered data sent to your email:
On the top back panel, click Save and name your filter, e. g. All visited sites.
Go to the Notifications tab and enable Activate Notifications.
Specify how you’d like to receive the reports:
New: HTML reports sent every time the filter is triggered.
Daily, Weekly, or Monthly: PDF reports emailed based on the selected schedule.
Add your email address the relevant field.
Save the filter. A test report will be sent to your inbox with the applied settings.
Note
Make sure email settings are configured for notifications. For setup instructions, refer to the Configure email settings guide.
Configuring Web Console Administrators
In the Administration menu, create a new account and assign permissions. You can find more details in the article Administrators.
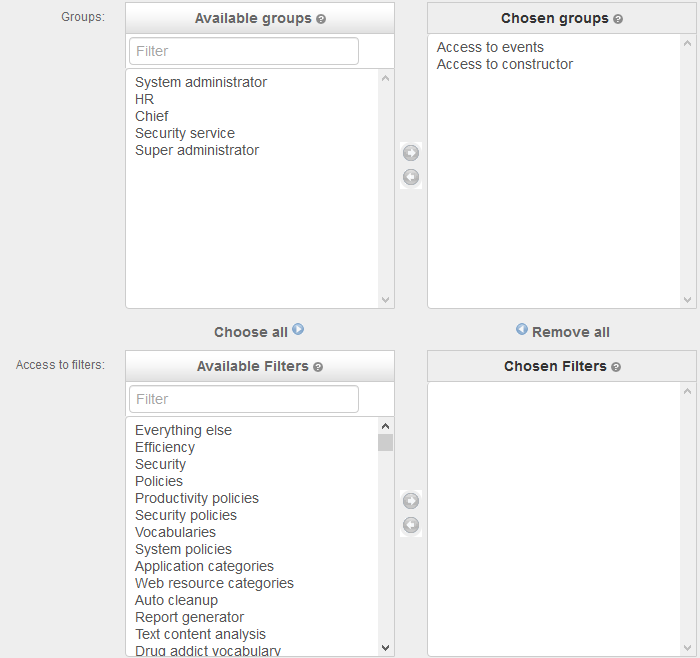
Case: Customizing Access to Menus and Filters
For example, you may want to hide the Administration menu, restrict user viewing, and make all filters and reports available:
In the Control Panel, open Administrators, create a new account or select an administrator.
Set the permissions:
Under Available Groups, enable Access to events, Access to constructor, and Access to reports.
In Available Filters, all filters and reports are available for use by default.
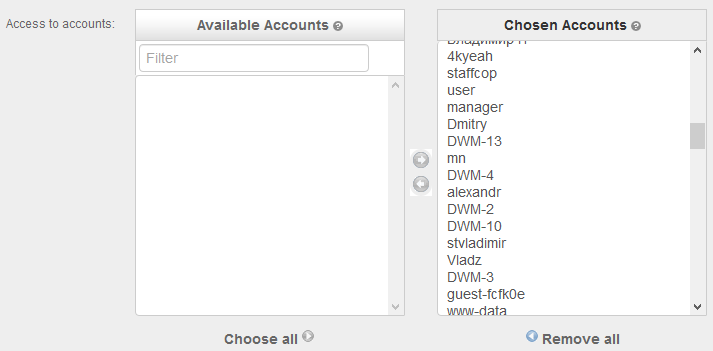
In Available Accounts, move specific users from the Available to the Selected column. The administrator will only see these users.
The configuration should match the examples shown below: