Install agents from admin interface
Agents can be installed from admin interface. To do that open Admin -> Control panel -> Remote install
Install to LAN
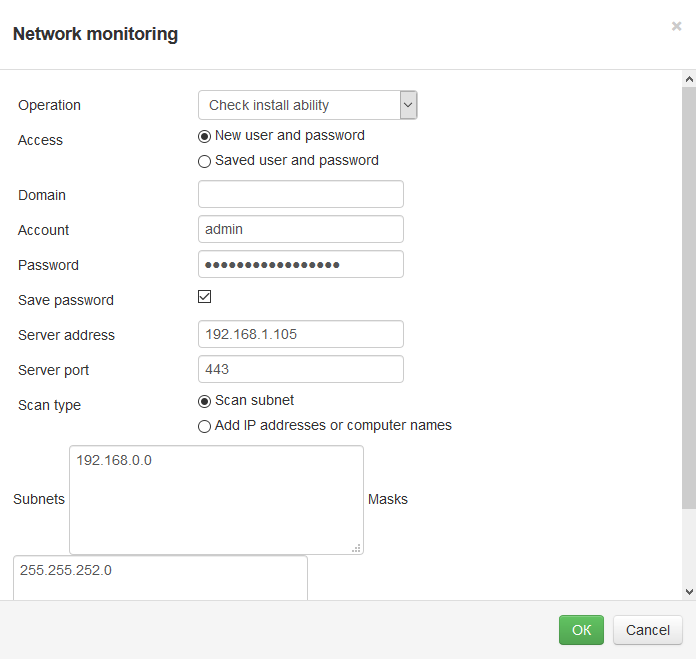
- Operation - install, reinstall, uninstall an agent or check the ability of installation within the scanned network range.
- Domain - specify the domain account if it’s used.
- Access - here you can select an existing login and password from the Credentials storage.
- Save password - saves login and password to Credentials storage.
- Account - user login.
- Password - user password.
- Server address - StaffCop server address.
- Server port - StaffCop server port. By default it’s 443.
- Scan type - here you can select whether to scan the whole subnet or to install agents on workstations with specified IPs.
Note
You must have the administrator rights on the remote computers.
When net scanning is started a status bar will appear:

Possible errors
If you meet errors of type “ERROR: No memory” or “Manual configuring required” then run cmd on the workstation with installed agent and execute:
reg add HKEY_LOCAL_MACHINE\SYSTEM\CurrentControlSet\services\LanmanServer\Parameters /t REG_DWORD /v Size /d 00000003 /f
reg add "HKEY_LOCAL_MACHINE\SYSTEM\CurrentControlSet\Control\Session Manager\Memory Management" /t REG_DWORD /v LargeSystemCache /d 00000001 /f
net stop browser
net stop lanmanserver
net start lanmanserver
net start browser
Installation of a Windows-agent using Active Directory
Note
For the ability to install computers in Active Directory you should set AD parameters and test connection.
When connection to Active Directory is configure you will see installation interface:
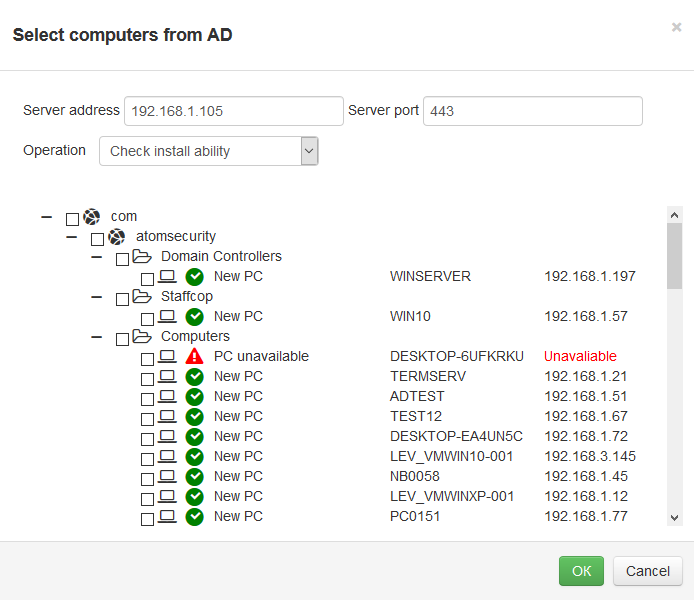
Specify the address and the port of the server, select computer for installation and required operation. Click “OK”.