Changing the Staffcop Server IP Address
Note
Specify the current Staffcop server address in the Server domain or address parameter
Automatically changing Ubuntu IP address
Note
This method ensures that the current address remains unchanged. The current dynamic IP address will be set as the static address.
To change the address, run:
wget docs.staffcop.ru/dynamic-to-static-ip.sh
sudo bash dynamic-to-static-ip.sh
If you want to immediately assign a specific address to the server, add the address after a space after the script name, like so:
sudo bash dynamic-to-static-ip.sh 192.168.1.132
Manually changing Ubuntu IP address
Warning
Only available for versions starting from 4.7.
The Netplan utility is used to set a static IP address for an Ubuntu server.
1. Install Netplan
apt install netplan
All Netplan configurations must be performed as the root user. To do so, enter root mode with the sudo su command and enter the regular user password:
sudo su
2. Disable Cloud-init
After installing Netplan, disable Cloud-init.
Note
Cloud-init is a tool for configuring servers during startup. Cloud-init may reset manually configured network settings on servers with static IP addresses. To prevent that from happening, Cloud-init disable network management.
Create a file:
sudo nano /etc/cloud/cloud.cfg.d/99-disable-network-config.cfg
Append a line to the file that disables Cloud-Init network management:
network: {config: disabled}
To prevent network settings from being overwritten, delete the Cloud-init configuration file for Netplan:
sudo rm -f /etc/netplan/50-cloud-init.yaml
You can now create your own configuration.
3. Create a Configuration
Determine which file contains the current configuration. You can do so by viewing the contents of the /etc/netplan folder using the ls command:
ls /etc/netplan

In this example, the configuration is in the file 01-netcfg.yaml. Launch the Nano editor with the name of this file as the parameter:
nano /etc/netplan/01-netcfg.yaml
The editor window will open.
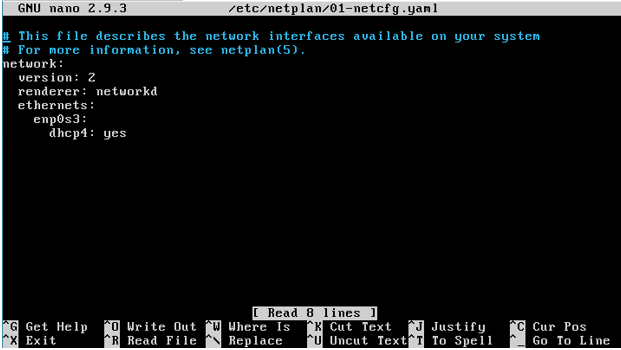
Append the following snippet to the file:
network:
  version: 2
  renderer: networkd
  ethernets:
    enp0s3:
      dhcp4: no
      dhcp6: no
      addresses: [192.168.124.200/24]
      gateway4: 192.168.124.1
      nameservers:
       addresses: [192.168.124.1, 8.8.8.8, 8.8.4.4]
In Ubuntu 22.04, the configuration format has slightly changed. Instead of using the deprecated gateway4, specify the route using the via key.
network:
version: 2
renderer: networkd
ethernets:
    ens33:
    dhcp4: no
    dhcp6: no
    addresses:
        - 192.168.124.200/24
    routes:
        - to: 0.0.0.0/0
        via:  192.168.124.1
    nameservers:
        addresses:
        - 192.168.124.1
        - 8.8.8.8
        - 8.8.4.4
where:
the address
192.168.124.200in the first lineaddressesis replaced with your server addressthe mask
/24corresponds to255.255.255.0if it matches your mask, don’t change anything
otherwise, replace it with your own mask
the address
192.168.124.1in thegateway4orvialine is replaced with your gateway addressthe DNS servers’ addresses in the second line
addressesare replaced with your DNS servers’ addressesthere is at least one blank line at the end of the file
After you’ve finished making changes, exit editing mode by pressing Ctrl+X. The editor will ask if you want to save the modified file:
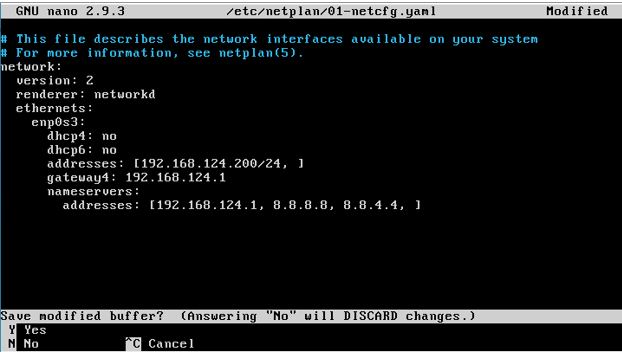
Press Y (yes) to confirm. The editor will suggest a file name to save the file. Press Enter to accept.
Apply the configuration:
netplan apply
If the output shows no errors, everything is working correctly. To confirm, reboot using the reboot command and check if the IP address is assigned:
ifconfig -a

Last Updated: 24.06.26