Event and User Risk Level
Starting with version 5.5, the Risk Level feature allows you to assign significance to security policy events.
This tool provides valuable insights to assess the severity of incidents and evaluate potential risks associated with each employee.
Activate Risk Level
Risk Level feature is disabled by default to optimize server performance. Follow these steps to activate it:
Open the configuration file /etc/staffcop/config on the server using Nano or any other text editor:
sudo nano /etc/staffcop/config
Add the following line at the end of the file:
RISK_LEVEL_ENABLED = True
Save the changes.
Run the command to restart the service:
staffcop restart
Once activated, Risk Level will be available as an option in the Triggered Policies section.
Configure Risk Level
The Risk Level feature allows you to assign specific risk levels to policies and dictionaries categorized as Incident, enabling better incident management.
The Incident category supports:
Productivity policies
Security policies
Dictionary search
Assign the Incident category to the policy first, and then configure its risk level.
Note
Both default and custom policies and dictionaries are compatible with Risk Level.
Note
Avoid assigning a risk level to policies that cover large number of events, such as Productivity Policies. This may result in an increased user risk level due to numerous false positives.
Follow these steps to configure the Risk level:
Open the Policy tab on the bottom panel.
Navigate the Policies folder.
Select a policy to configure.
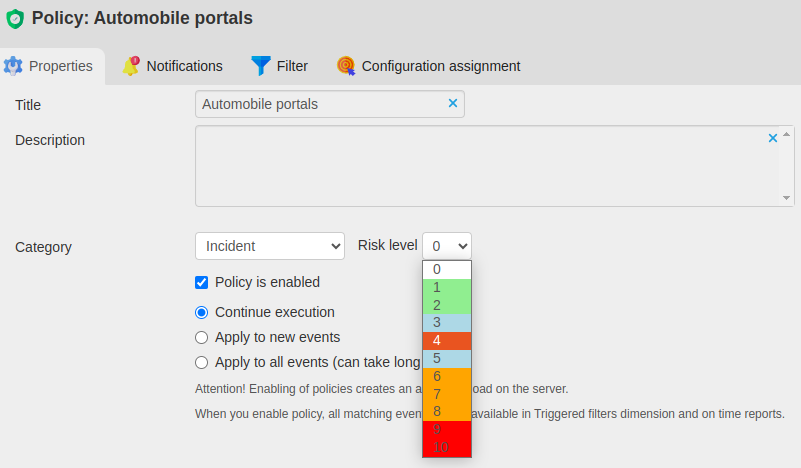
In the pop-up window, switch to the Properties tab.
In the Category dropdown, select Incident.
In the Risk Level field, choose a value between 0 and 10 based on the following color-coded scale:
0: White
1–2: Light green
3–5: Light blue
6–8: Orange
9–10: Red
When a risk level is assigned to a policy, the server will automatically associate that level with any events triggered by the policy. The user’s risk level is calculated based on these triggered events.
Note
If a risk level is not assigned, or the policy category is changed from Incident, the risk level will reset to 0.
Manage Event Risk Level
How Event Risk Levels Are Calculated
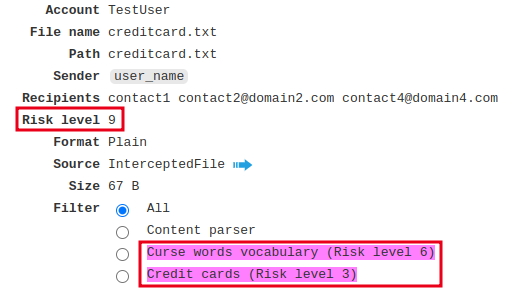
Event risk levels are determined by the policies that trigger them. Each policy has its own risk level, and when that policy is triggered by an event, the event will inherit the same risk level. For example, if the Credit Card policy has a risk level of 3, and an event triggers that policy, the event will be assigned a risk level of 3.
If multiple policies are triggered by the same event, the event will have a combined risk level, calculated by adding together the risk levels of all the triggered policies. So, if an event triggers both the Credit Card policy with a risk level of 3 and the Curse words vocabulary policy with a risk level of 6, the total risk level of the event will be 9 (3 + 6).
Note
To ensure fairness, the total risk level for an event cannot exceed 20, even if the combined risk levels of the triggered policies would result in a higher number. This cap prevents one very high-risk policy from having an outsized influence on the final risk level of the event. For example, if an event triggers policies with a combined risk level of 25, the total risk level for the event will still be capped at 20.
Viewing Events with Assigned Risk Levels
To view events with assigned risk levels:
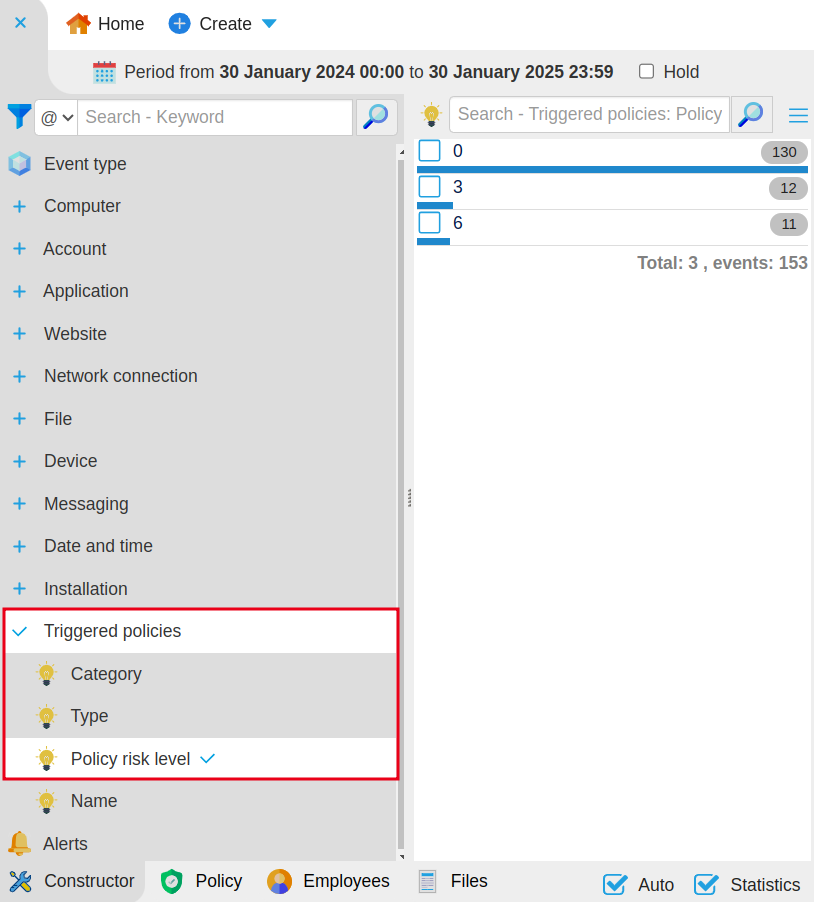
Go to Constructor.
In the Triggered Policies section, select Policy Risk Level.
Constructor will then display a list of events grouped by the risk level of the triggered policies. The risk level for each event will be shown in the Risk Level column on the right.
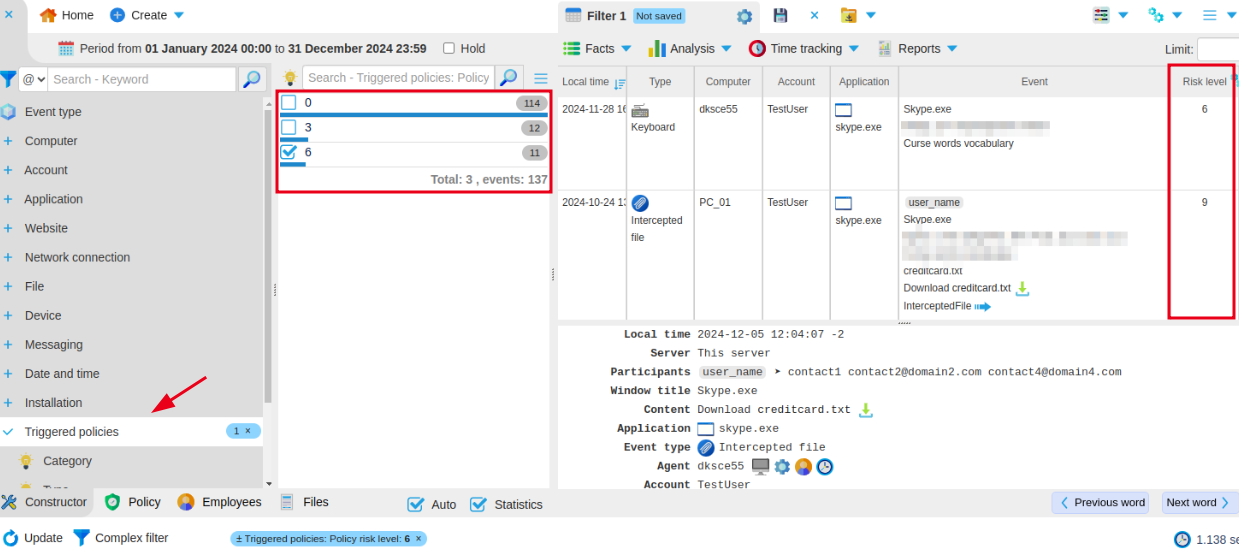
By default, the Risk Level column is hidden in Event Lens. To make it visible:
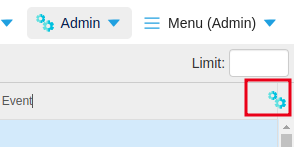
Click the gear icon on the right of the table and select New Setting.
Under Available Fields, find the Risk Level row in the Fact column and move it to Selected Fields.
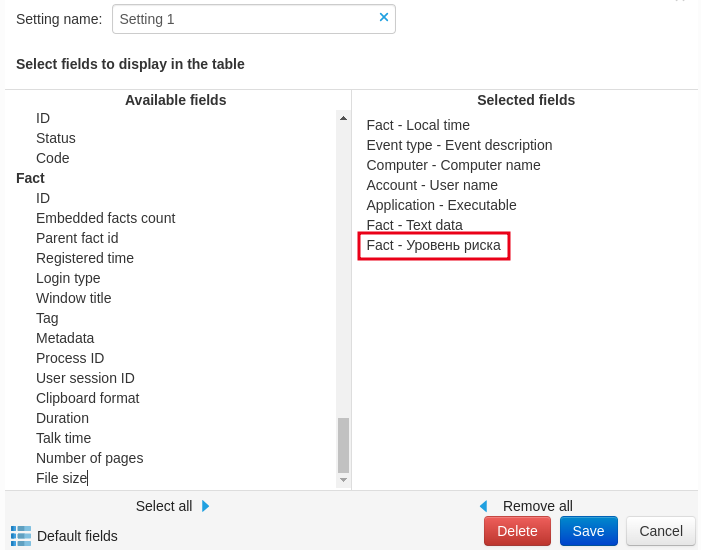
Save your changes.
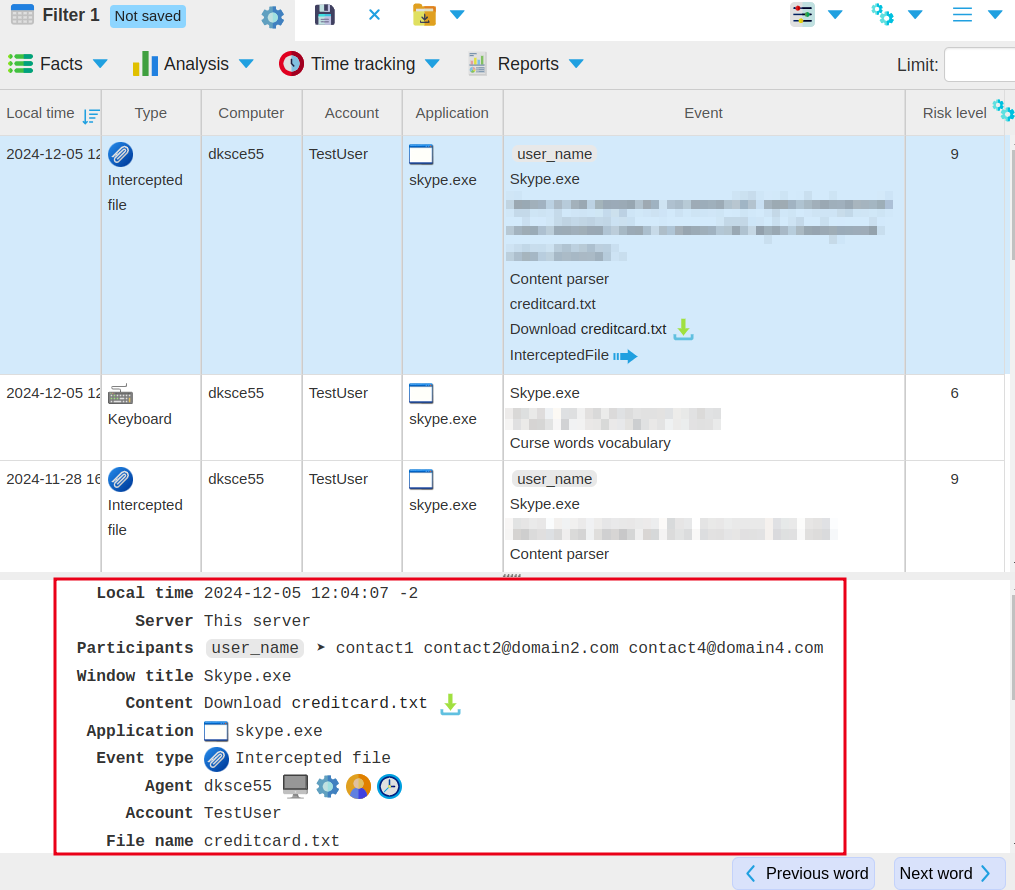
Afterward, the Risk Level column will appear in the table.
To view an event’s details, select an event group. Then, select an event in Lens. The risk level of the event will be shown in the Event Information panel under the list of events.
Filtering and Configuring Notifications
To filter and sort events by a specific risk level, you can use the filter or complex filter. For example, you can get a list of events with a risk level of 10 for a specific subnet. To filter events by total risk, use a complex filter.
Only events that match your criteria will appear in the Constructor.
Additionally, you can configure notifications to alert you to events with specified risk levels.
Filter Events by Policy Risk Level
To filter events using a complex filter:
Create a new filter or open an existing one.
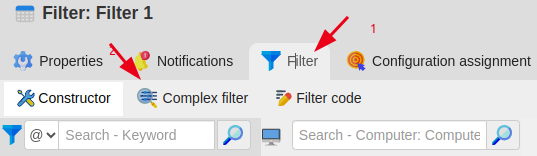
In the Filter tab, select Complex Filter.
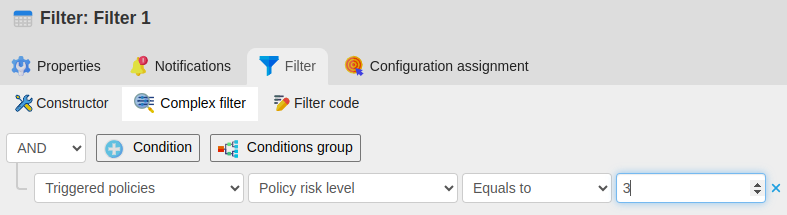
Click +Condition to add a new condition.
Set Triggered Policies to Policy Risk Level.
Select a logical operator and specify the risk level.
Optionally, you can add more conditions to refine your filter.
Switch to the Notifications tab and set up email alerts.
Save the filter.
Outcome: Event Lens will now display only events triggered by at least one policy with the specified risk level.
Create a new filter or open an existing one.
In the Filter tab, select Constructor.
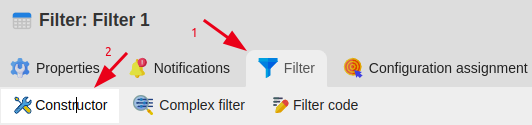
In the left sidebar, under Triggered Policies, choose Risk Level.
Select the required risk level from the available options in the second column.
Note
In the second column, you can find the risk levels of the triggered policies, like 0, 2, 3, or 6. Next to each risk level, it is shown how many times the policy was triggered. Events are listed in the table on the right. It’s important to note that one event can be linked to multiple policies, so the number of events might be fewer than the total number of policy triggers.

If needed, add more conditions and set up email notifications under the Notifications tab.
Save the filter.
Outcome: Event Lens will display events triggered by at least one policy with the specified risk level based on your filter conditions.
Filter Event by Total Risk Level
To filter events based on the total risk level across all triggered policies:
Create a new filter or open an existing one.
Navigate to Filter → Complex Filter.
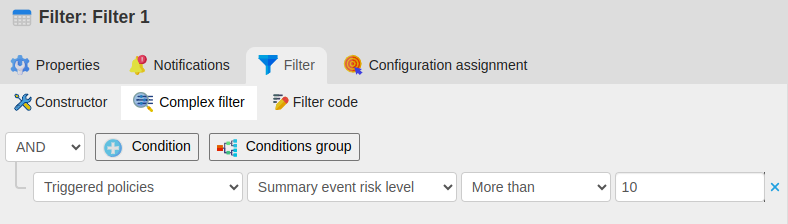
Click +Condition.
Set Triggered Policies to Summary Event Risk Level.
Choose a logical operator and specify the risk level.
Optional. Add more conditions.
Configure email notifications in the Notifications tab.
Save the filter.
Result: Event Lens will show events where the total risk level from all triggered policies meets your criteria.
Analyse Risk Level
To create visual charts and analyze risk levels, follow these steps:
Open the Analysis menu and select a data visualization type, such as Linear Chart.

Choose the data measure, like Date and Time → Day.
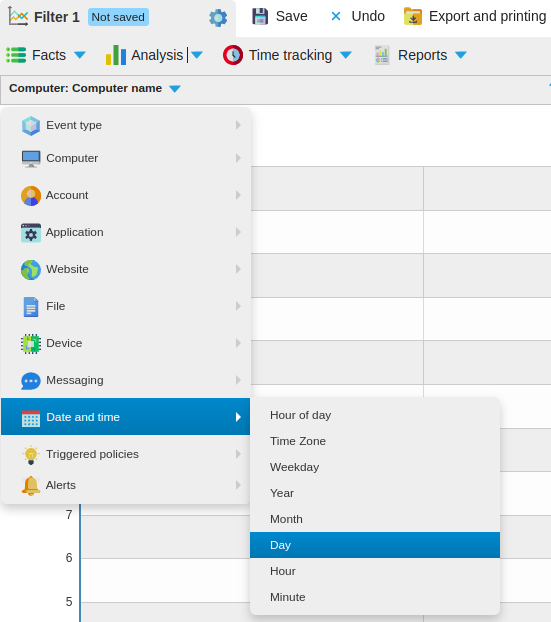
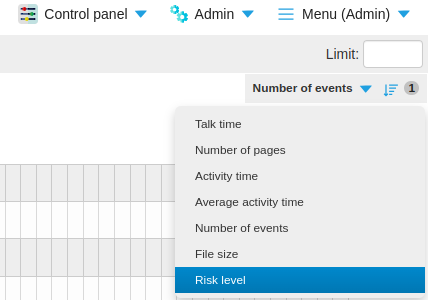
On the right of the screen, under the upside-down triangle icon, select Risk Level as the measure.
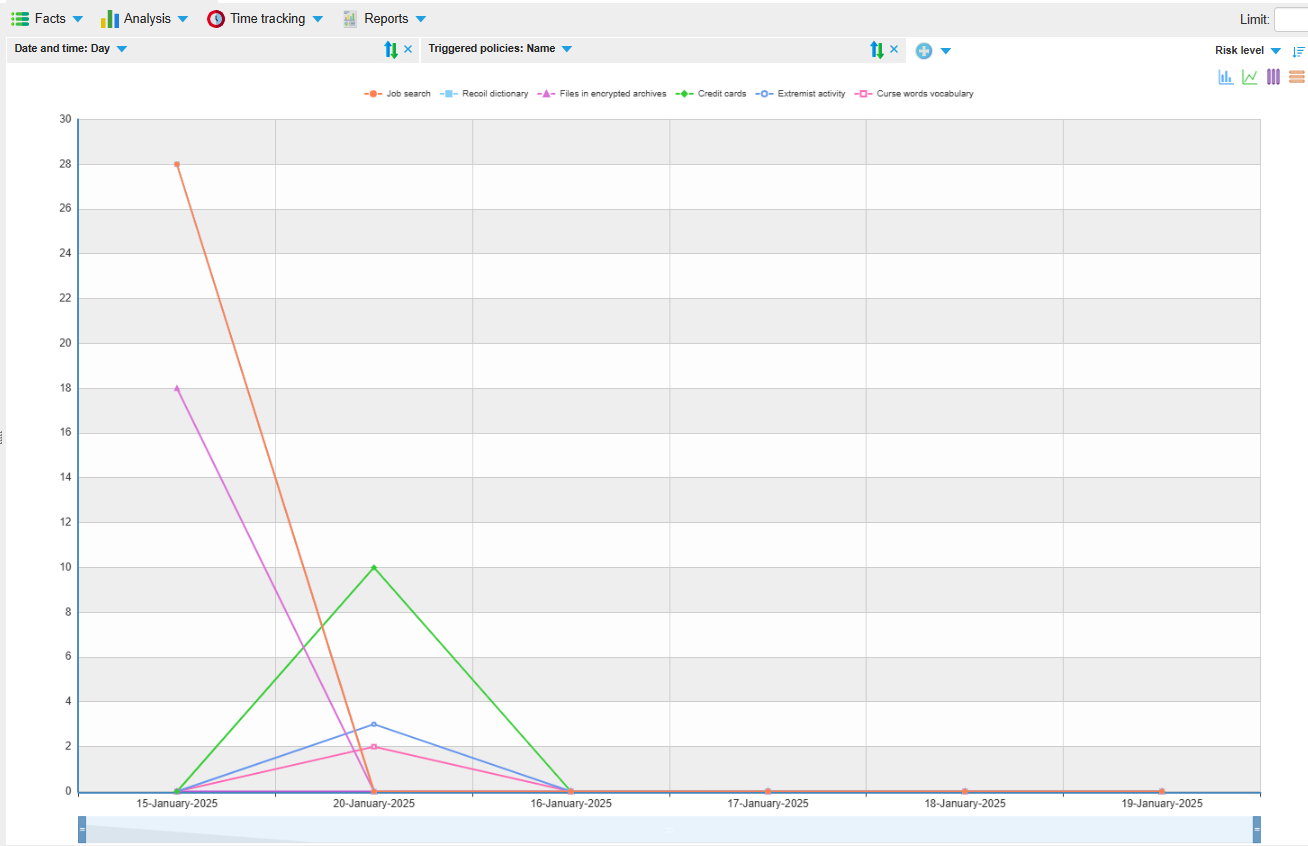
The chart will be generated automatically.
Managing User Risk Levels
Note
To view user risk levels, ensure Employee Cards are activated.
The user risk level is calculated from events that have an assigned risk level.
The server combines event risks over a specified number of days, considering the maximum allowable risk per day, and sends alerts when the risk level goes up.
The results are displayed in both the Summary Card and individual Employee Cards.
Calculations are performed according to Server Settings.
How to Set the User Risk Level
Go to the Control Panel and select Server Settings.
In Server Settings, adjust two settings:
User Risk Calculation Parameters: Number of Days – Defines the time window for risk calculation.
Allowed values: 0—84 days
Default: 14 days
User Risk Calculation Parameters: Maximum Risk Value Per Day – Sets the maximum risk points assigned per day.
Allowed values is 0 to 10,000
Default value is 100
Click Save to apply the changes.
Example of User Risk Calculation
Assume the following User Risk Calculation Parameters:
The user risk level is calculated over the last 14 days.
The daily risk level cannot exceed 100 points.
From September 16 to October 14, the system logged these events:
Period |
Events with Risk Level > 0 |
Total Event Risk |
User Risk Level |
Explanation |
Sep 16 — Sep 30 |
None |
0 |
0 |
No events recorded during this period. |
Oct 1 |
Events with total risk = 90 |
90 |
90 |
Risk is below the daily max. |
Oct 2 — Oct 13 |
None |
0 |
90 |
Risk from Oct 1 persists; no new events. |
Oct 14 |
Events with total risk = 250 |
250 |
190 |
Exceeds daily cap; adds 100 to prior total. |
Oct 15 |
None |
0 |
100 |
Risk resets after 14 days, capped at 100. |
This example illustrates how the system calculates and caps user risk levels over time.
Configuring Notifications
To receive notifications when users reach specific risk levels, create a policy:
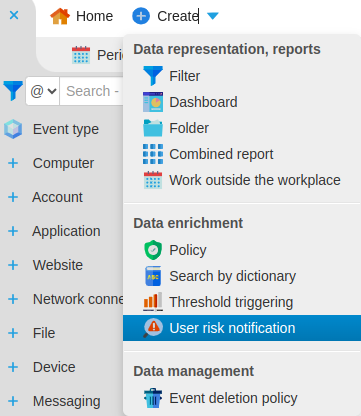
In the top menu on the left, click + Create and select User Risk Notification.
In the Title field, enter User Risk Notification.
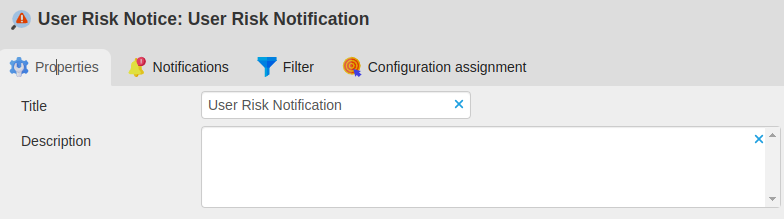
Optionally, provide a policy description.
Go to the Notifications tab to set up your alerts.
Notifications Tab
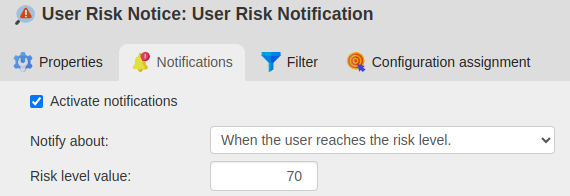
In the Notifications tab, activate notifications by checking the Activate Notifications box.
Under Notify about, choose your preferred notification conditions:
When the risk level chenges to the specified value
When the user reaches the risk level
If you select When the risk level chenges to the specified value, specify the time period for the risk value change. The default period is 1 day.
Set the Risk Level Value. The default value is 70.
In the Regularity section, configure how often to receive reports.
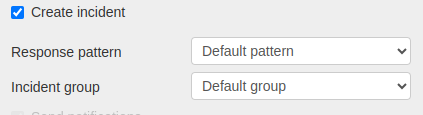
To create an incident when the policy is triggered, check the Incident option and define:
Response Pattern — the predefined set of actions to handle the incident.
Incident Group — the group the incident belongs to, like Risk Level.
Add your email address, or use the default one.
Filter Tab
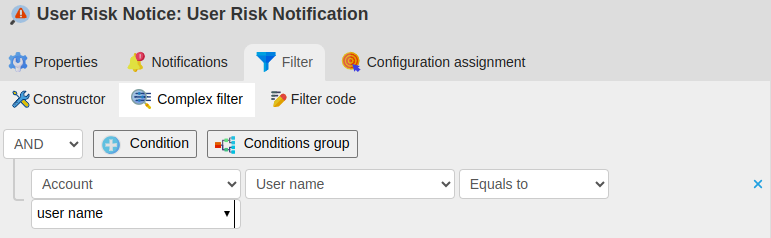
In the Filter tab, you can filter notifications using either Complex Filter or Constructor.
Select Complex Filter as the filter type.
Click + Condition.
Fill in the fields: User → Full Name → Equals to → enter the user’s name.
Select Constructor as the filter type.
In the left sidebar, select User Name, then check the user from the list. Note that the Constructor only supports filtering based on the Account dimensions.
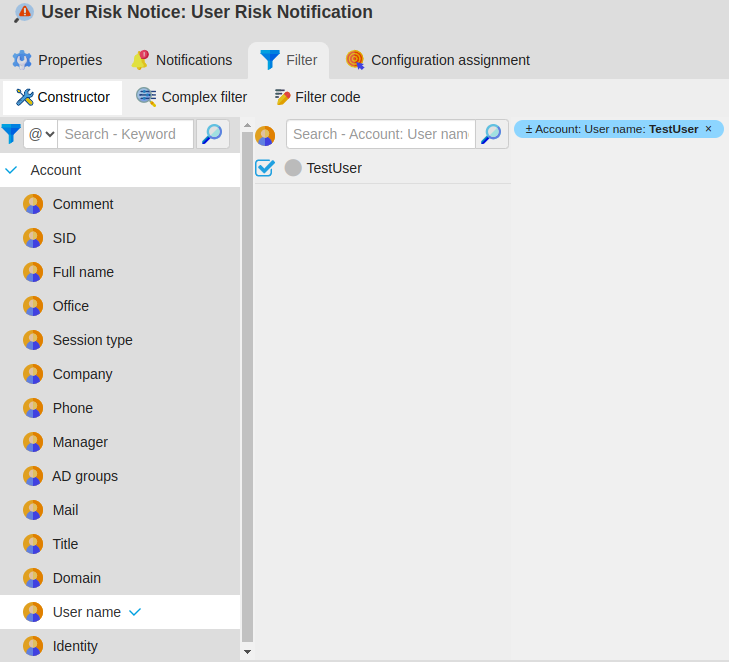
Note
If no user filter is set, notifications will be sent for the risk levels of all users.
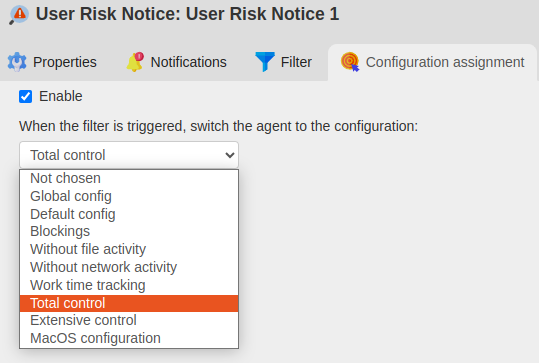
Configuration Tab
You can enable configuration changes when the policy is triggered. This can be useful if a user shows a sharp increase in risk level and the configuration needs to be changed.
Check the Enable box.
From the list, select the configuration to apply when the policy is triggered. For example, you can activate a more stringent configuration, such as Total Control.
Once you have configured the policy, the server will display a report on the right side of the screen, listing the users and their risk levels.
Viewing Employee Risk Level
You can easily check an employee’s risk level on their Employee Card, accessible from the Employees tab in the bottom panel.
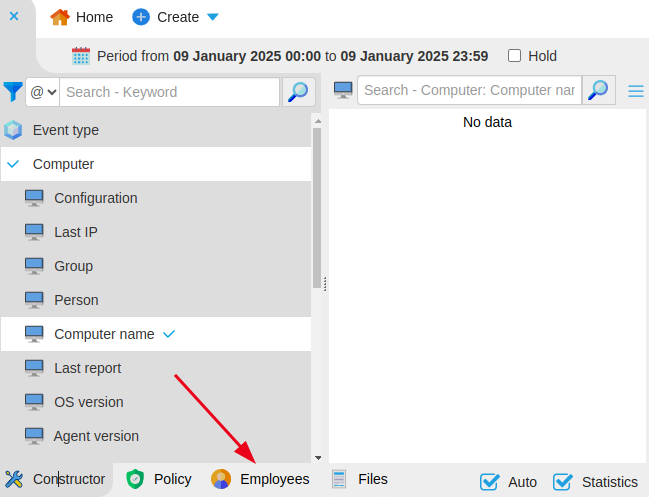
The Employees tab lists the Summary Card, which provides an overview of employee risk levels, and employee cards, which offer detailed information for each individual employee.
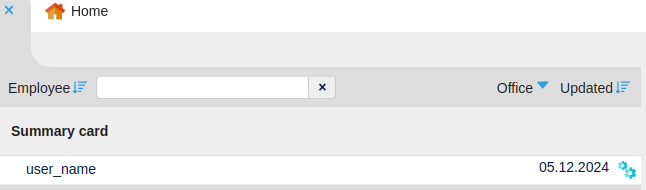
To view an employee’s card, click on their name.
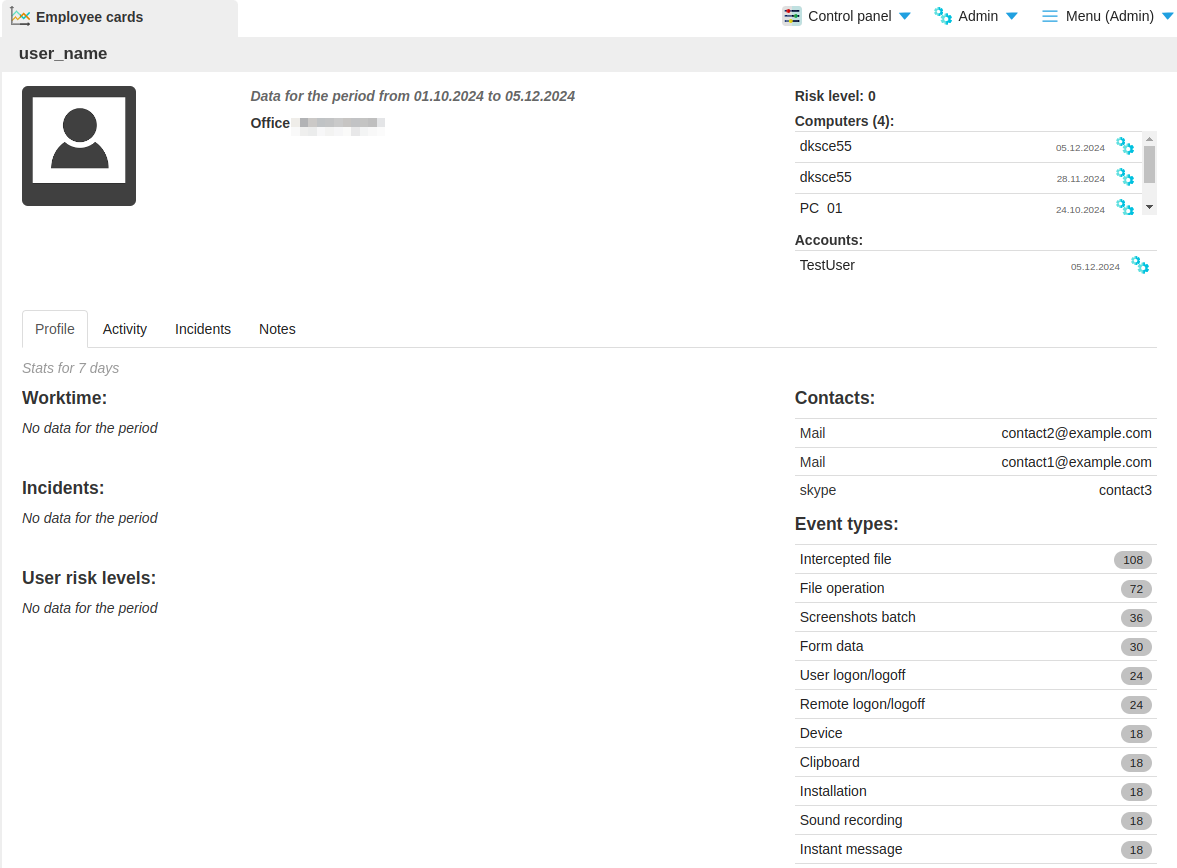
The card contains the tabs:
Profile: displays the employee’s risk level over the last 7 days, along with a chart showing the changes in risk.
Incidents: shows the total event risk levels for the employee over the last seven days.
Note
If a user has multiple accounts, the risk levels of all accounts are combined.
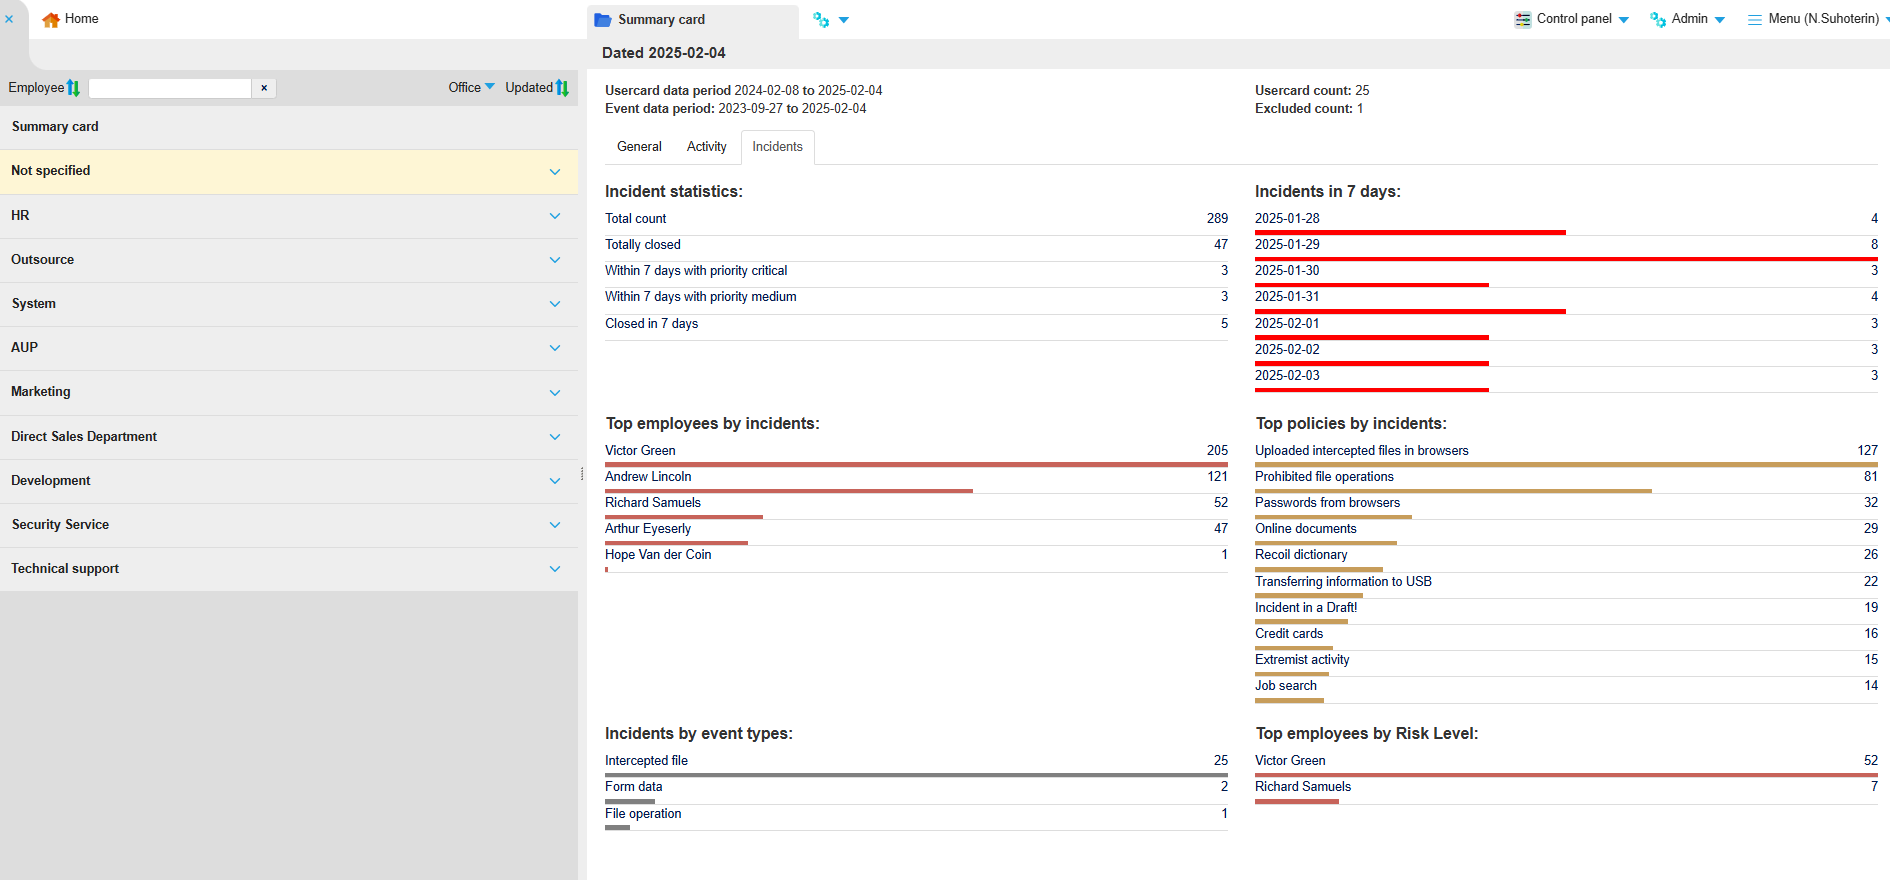
Summary Card
The Summary Card provides overview of monitoring insights. Check out the Top Employees by Risk Level report to see the ten employees with the highest risk scores.