External Storage Media Manager (VNI)
The External Storage Media Manager (VNI) is an add-on component designed to efficiently manage removable storage media.
The VNI Manager enables you to:
Control access rights for each VNI
Set the default access mode for VNIs
Grant VNI access rights to specific users
Activating VNI Manager
The VNI Manager component is activated via a paid or a test key. To enable it, activate the server with the key that includes the VNI Manager component. Once activated, the VNI Manager will be available on the server. Access to storage media is managed based on the rights set on the VNI Manager dashboard.
By default, all unregistered devices are granted read and write permissions.
Once the VNI Manager is activated and configured, the agent will send the following events to the server:
External Disks
File Operations
Intercepted Files
Devices
Working with the VNI Manager
To open VNI Manager, go to the Admin section and select VNI Manager. This will open a new page displaying a list of all VNIs registered within the Staffcop system.
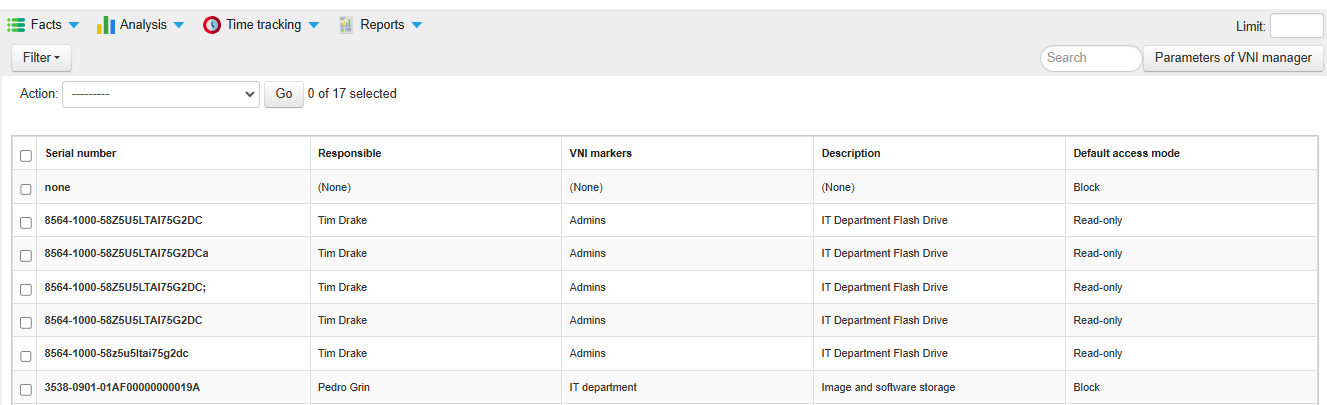
For each VNI, you’ll see the following details:
Serial Number: This is a unique identifier for the device.
If the VNI doesn’t have an assigned serial number, the system will display none in place of an ID.
The agent also stores IDs in lowercase in specific events, namely Disk Drive, File Operation, and Intercepted File, making easier to analyze activity.
Responsible: The employee responsible for the device.
VNI Marker: A tag used to group VNIs, like Analytics or Sales Department.
Description: Any extra details or notes about the device.
Default Access Mode: The initial access rights for the device, such as Read-only.
General Settings
To configure general settings, click on Parameters of VNI Manager in the upper-right corner.
User Notification
Note
Notifications are available only for the Linux agent.
In the Notifying the User of the Blocking section, you can set up messages for the following cases:
Attempting to write in Read-only mode: This message will appear if the user tries to write to a device set to Read-only.
On Linux, the user will see a system notification instead of the custom message.
Full device lock: This message is shown when the device is locked.
The agent sends notifications once per minute to avoid spamming. If the user tries to write again within that time, no new notification will be sent.
Default Permissions
You can configure default permissions in these sections:
Default Access Mode: Applies to all devices.
Permissions: Apply to all devices for a specific user.
To set permissions, simply select the appropriate access level from the list:
Read/Write
Block
Read-only

Setting Access Rights for Individual VNI
To set access rights for a specific VNI, select the device from the list on the main VNI Manager page:
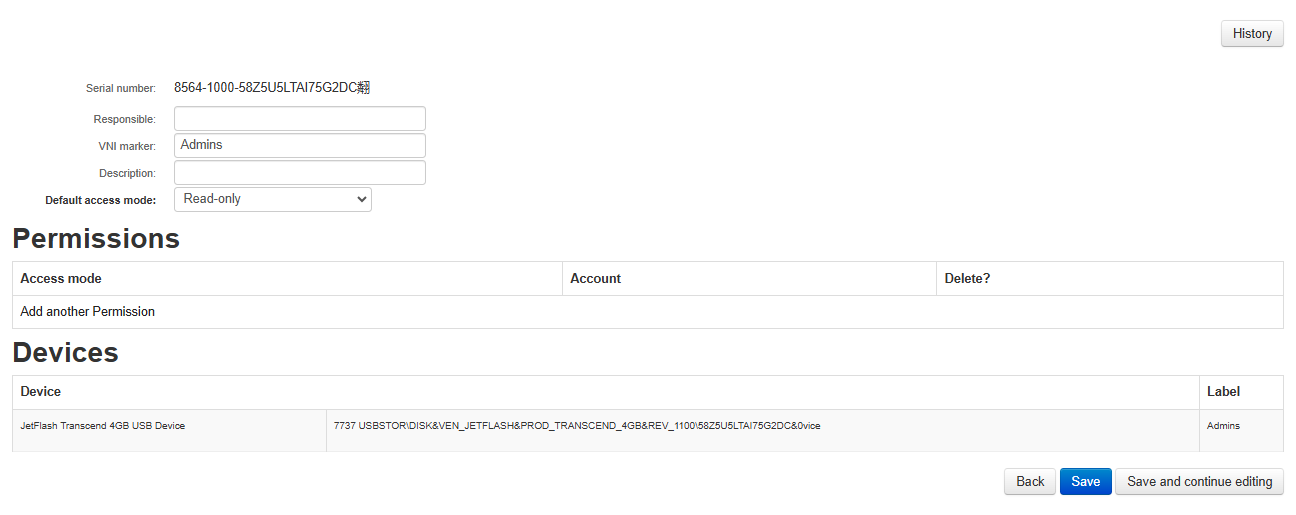
Complete the following fields:
Responsible: The employee assigned to manage the VNI.
VNI Marker: A tag used to group the VNI in reports.
Description: A detailed description of the VNI.
Default Access Mode: The default access rights assigned to the VNI.
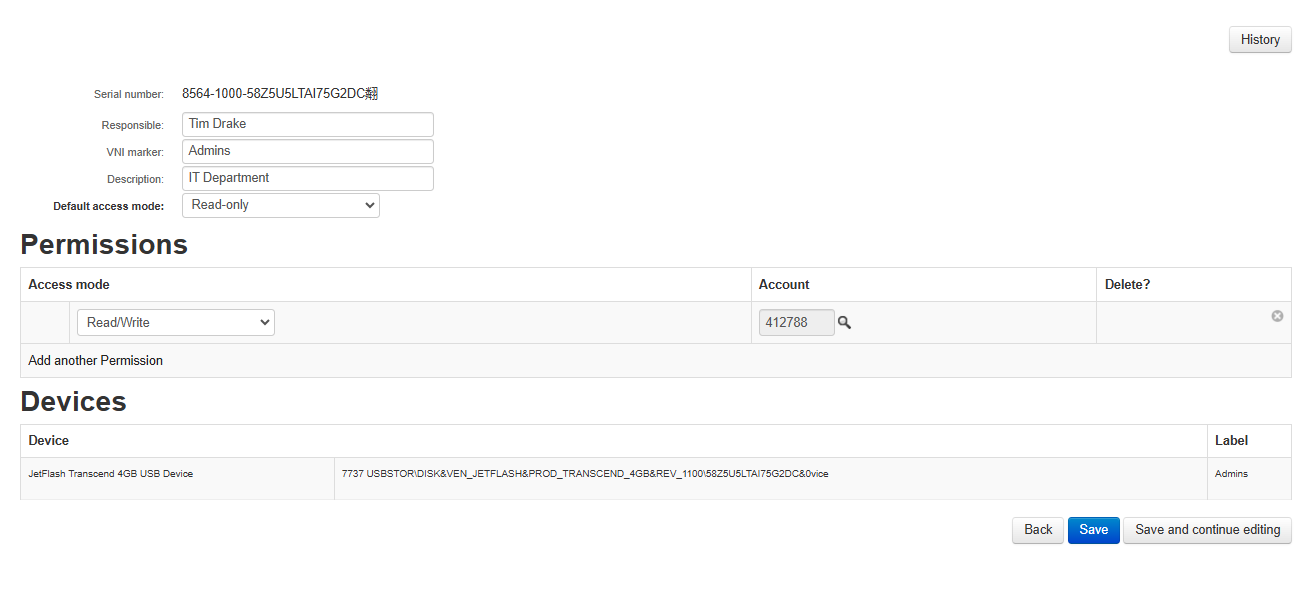
Permissions
In the Permissions section, set access rights for a specific user.
For example, VNI can be Read-Only by default, but Read/Write access can be granted to administrators in the Permissions section.
Devices
If a VNI connects to multiple computers, it may get different IDs. The Devices section shows all IDs assigned to the selected VNI.
Example: Setting Up Access Rights
To configure a VNI as Read-only for all users while granting Read/Write access to a specific user:
Go to Admin → VNI Manager.
Select your VNI from the list.
In the settings window, set the Default Access Mode to Read-only.
In the Permissions section, click Add another Permission.
Choose Read/Write as the access level.
Assign this permission to the specific user by selecting their name.
Save your changes.
Setting Up VNI Groups
VNI groups help organize devices by their roles or departments. To configure a VNI group:
Select your VNI from the list.
In the Action line, select Set Measurements.
In the settings window, specify:
Responsible: Assign someone responsible for this VNI.
VNI Marker: Set a marker or label for the VNI to help identify it or categorize it. For instance, you could use labels like HR Workstations or Sales Team.
Description: Add a description to explain the purpose or usage of this VNI, providing more context.
Save the changes.
Apply the same settings to all other devices in the group.
Administrator Notifications
The agent automatically sends notifications to the server when the device is blocked. These notifications include:
Time of the blocking
Username
Agent
Unique serial number of the VNI
When a write operation is blocked, the notification also provides details about the file the user tried to write.
To view notifications:
Navigate to the Constructor tab and select Alerts.
In the Alerts list, choose Operation Blocked.
The relevant alerts will appear in a table on the right side of the screen.
Shadow Copies
Windows and Linux agents can automatically create shadow copies when files are copied or moved to:
The PC
Other VNIs
A network share
To enable the agent to create and send shadow copies of files to the server, activate the following features in Configuration:
File System Activity
Shadow Copying
USB Device Control
These copies are stored in the Intercepted File event for later review.
Along with a copy, the agent also sends to the server the following details:
The file directory path on VNI
VNI details
The file directory path on the new device
New device details