Install on bare-metal
Create a boot disk on Windows
Installation on a virtual machine is often quite handy but it also has some weak points: performance reduction, dependence of virtual OS on the actual OS installed on a PC, e.t.c.
That’s why in some cases it makes sense to install StaffCop Server directly to a computer without any virtualization means.
For that you will need ISO image: Download the latest ISO image
Note
Please, pay attention that to install the software on the server you need access to the internet.
1. Common notes on installation
All the installation steps are similar to that of installation on a virtual machine, except for the following peculiarities:
1.1. Almost all modern hardware configurations are identified correctly and work well with Linux, in this case, with Ubuntu. Nevertheless we recommend to boot from live-dvd/live-usb before installation and make sure that all the required hardware (e.g. network card) is correctly identified by the system and works. How to create Live-usb on Ubuntu Desktop.
1.2. Installation on bare-metal requires creating a swap partition besides the main partition. It will be used when the physical RAM is fully occupied due to some reason. In average, the size of SWAP partition is recommended to be set equal to the size of RAM, and this space won’t be available for storing your data. Keep that in mind.
You can also move important data to a separate partition – in case with a home PC it is the user’s data, in case with StaffCop Server – it is the database.
Consider installing a second hard drive - SSD. It may be used for storing database, and this will significantly increase system performance.
1.3. You should also keep in mind that during the installation and after it you will have access only to the command-line. The installer works only in pseudo-graphical mode as windows managers (graphical shell) are traditionally considered an excess for servers.
2. Create a boot disk on Windows
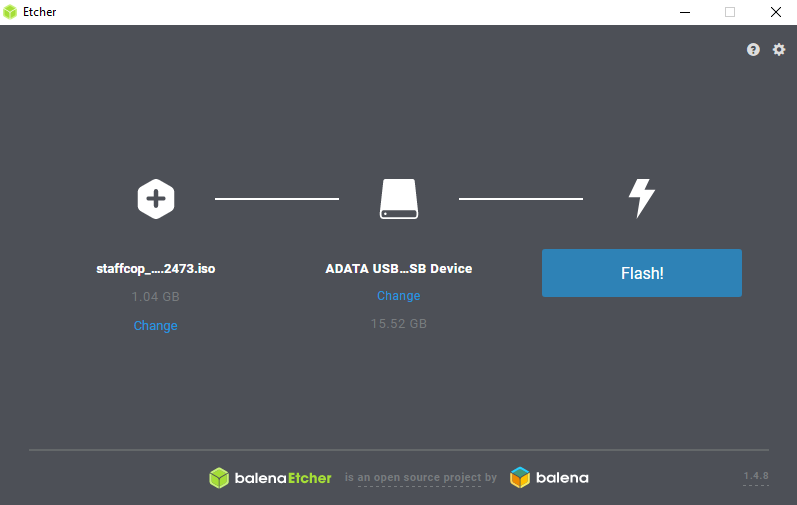
2.1. First you should write the ISO image to a DVD or flash drive. We recommend writing to a flash drive as the easiest and most reliable way, for Windows we recommend using - Etcher. Download the tool from the official site and launch it, then connect your flash drive to the system. Launch the tool, choose ISO image, choose USB-drive, click “Start” and wait.
When the boot disc is created, remove the flash drive from the computer and connect it to the future StaffCop Server.
2.2. Turn on/reboot the computer. Enter BIOS, usually one of the keys - F2, F4 or DEL - is used for that. Choose booting from DVD or USB-drive: it depends on the type of your boot disc.
2.3. Go to OS installer.
3. Createa boot disc from Linux
Write the ISO-image to a CD/DVD or USB-drive
In UNIX-like systems an image can be written to a USB-drive in the following way:
sudo dd if=staffcop_server.iso of=/dev/sdc
Where staffcop_server.iso – the path to the file of the ISO image, /dev/sdc – the device the image will be written to.
Warning
Be careful when writing the name of the device! /dev/sdc is given for an example. You may erase data on one of the drives by mistake.
We will get a USB-drive that can be used as a boot-disk.
4. Choosing the boot drive
In some cases to boot successfully from the ISO image you must state the booting priority in BIOS/UEFI: the chosen boot device must be listed before all other booting drives.
5. OS installation dialog
In case you have booted successfully from the ISO image you will see the dialog for choosing language
Then follow this guide Install from ISO-image.
Note
Avoid giving SSH-access to your server from outside your corporate network. In case of necessity, use key authorization and not commonly used ssh-port to decrease the chance of exposing your server.