Get started
This section contents the basic information required to start working with StaffCop Enterprise - a software system for employee monitoring
Overview
- Activate the license and open the admin interface
- Configure endpoint monitoring to fit the network capabilities
- Start working with data received from endpoints
- Build reports and send notifications
- Configure access rights
Activate the license and open the admin interface
When you first enter the admin interface, a form for creating a password for administrator opens. Create the password using letters and figures and click the Change password button. If you have lost the password for admin interface, run the following command in the Ubuntu command line interface
sudo staffcop passwd new_password
When you see the autorization form opened, enter the admin interface with the login admin and the password you previously created.
Activation form opens
There are several ways of activation.
Configure endpoint monitoring
When an endpoint agents is installed on a workstation it gets registered at the StaffCop Enteprise Server if there are free licenses
You can check the fact of this agent registration at the server by choosing Admin -> Control panel -> Computers.
You will see the page with this agent entry in the list of agents
If you see an “empty” entry you should wait a bit, until the agent is registered and then refresh the list of agents in the admin interface.
Agent name corresponds to the name of the workstation where it’s installed, to its serial number or HWID of a workstation.
The list of agents should look like that:
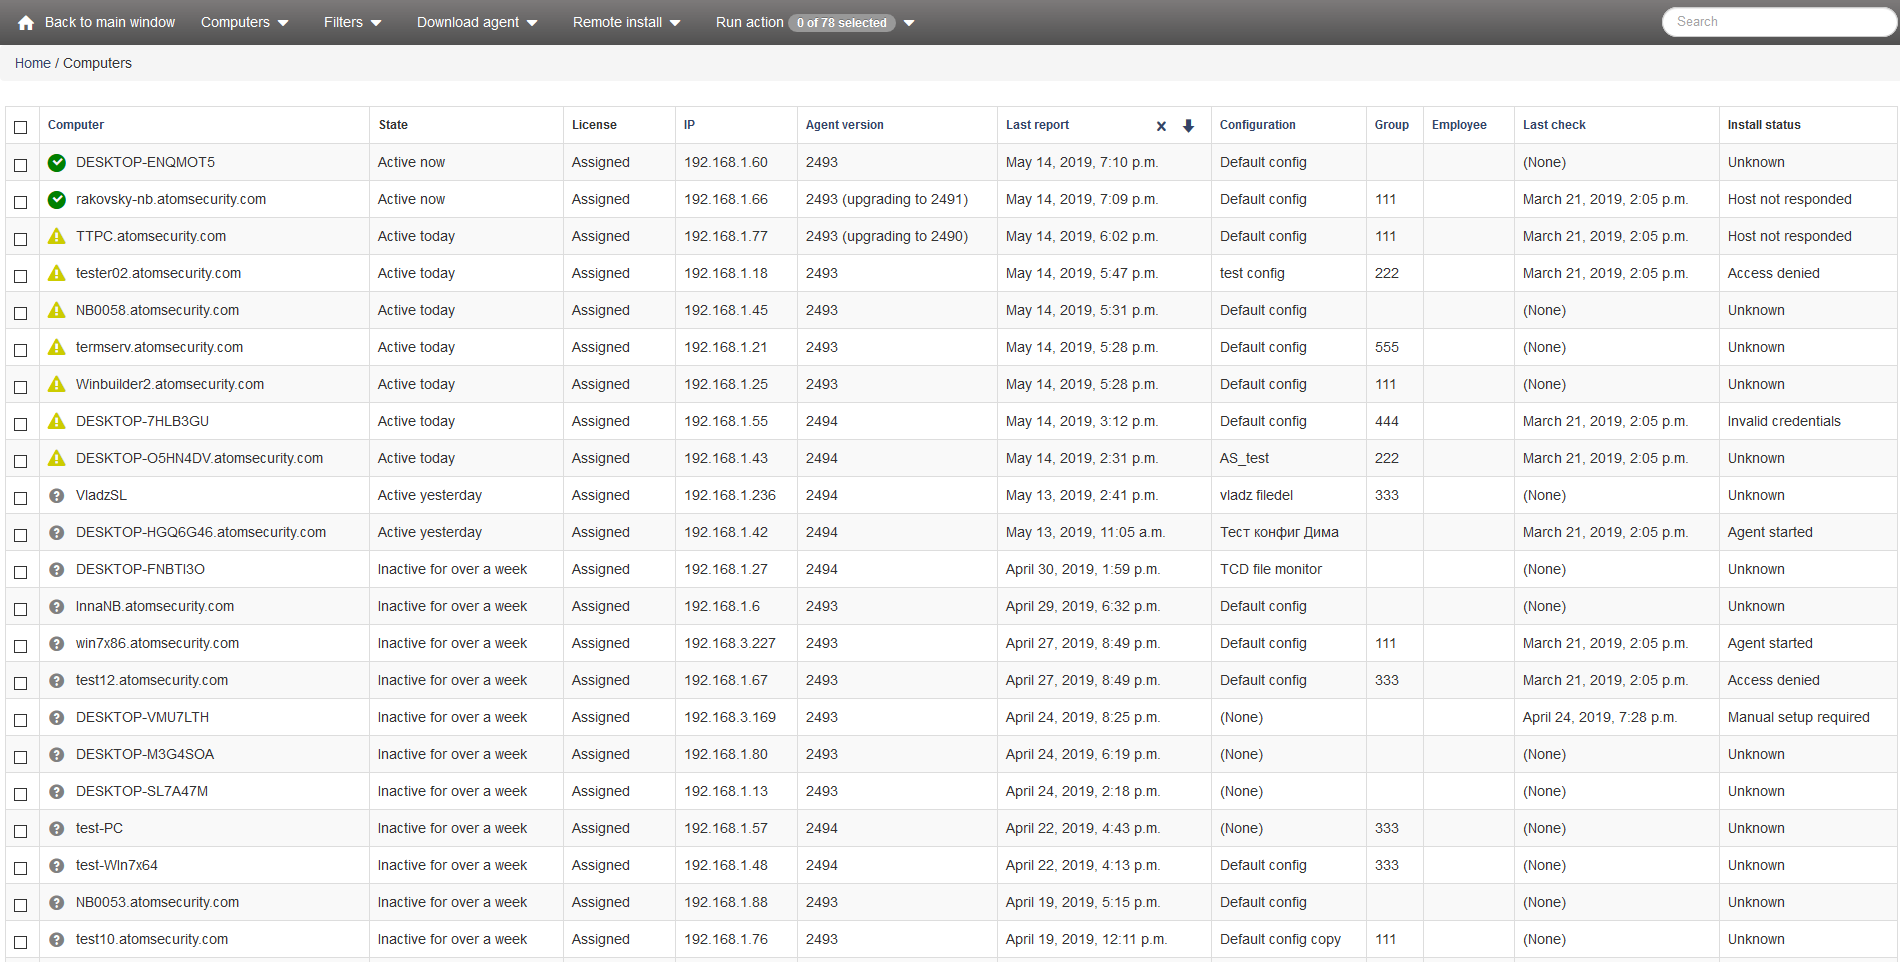
When an agent is registered at the server it’s been assigned the Default Config. This is the configuration it gets settings from , to define the rules of monitoring events on a workstation.
Default config is created only for receiving information
- on user activity in applications and web-sites (time tracking)
- register keystrokes (keylogger)
- receive information on installed hardware
- receive information on installed software
To perform full monitoring on all user actions you can assign another configuration - Total control.
The following steps are required:
- Open Admin -> Control panel -> Computers configuration, find and open Total Control.
- Switch to Assign agents tab.
- Using the navigation buttons you can assign configuration to agents. For example, click the “Choose all” in “Available agents” button totransfer them to the column “Chosen agents:”
- Scroll down to the very bottom of the configuration form and click the Save button
You will find more details in this article.
In 1-2 minutes new configuration will be applied on the chosen workstations.
Note
Attention! If after assigning of Total control you meet any troubles, you should contact your system administrator and tell him that such problems can be caused by the following things:
- common exclusions for anti-virus are not set
- specific web-sites and application, which require fine tuning of monitoring rules
- other implicit problems that you should solve in cooperation with our technical department
If you meet any troubles with performance or unavailability of network resources on a PC with installed agent, switch it to Default config and study the detailed guide on configuration or consult or technical department.
You will find more details on configuring Here.
If the agents and the server are correctly configured but the data is displayed in past or future that means the time zones of the agents and the server were setup incorrectly.
To correctly setup time zone on the server use this instruction.
Start working with data
Before starting to work it’s better better to study the key elements of web interface
To work with the data collected from agents the following tabs are used: Constructor and Filters.
The principle of work is in selecting elements in Constructor
Constructor contains main dimensions on categories
Chosen filtration criteria can be saved as a filter.
Details on saving filters are given in the instruction Filter navigation panel.
Filters represent filtration parameters set in Constructor and saved.
Let’s a consider an example of working with data
- Switch to Constructor and choose Event type.
- Then select Keyboard input.
- Then switch to Computer dimension and choose the Computer you are interested in.
- In “Lens” (top right part of the window) choose Facts -> Table as the view mode.
- Click the Save button on the black panel and set the name for the filter in the pop-up window, saving the filter.
- Switch to Filters and open the filter you have just created.
- You can set Period to be the range of 7 days.
As a result the filter parameters will be displayed in the lowers panel when choosing the filter (Computer and Event type - Keyboard input*). and the table of facts will display only the events on the chosen computer and event type Keyboard input.
Build reports and send notifications
Constructor menu can be divided into two parts:
- view modes modes
- report modes
View modes are represented by the menu items in Facts and Analysis.**Report modes** are represented by all the other menu items being various report patterns.
Let’s take an example. We need to download a table on web-site visiting:
- In Lens (top-right part of the window) choose Analysis -> Table.
- Select Website -> Domain.
- Choose Activity time as the measurement type.
- In Constructor select Computer -> Computer name.
- Click Export and printing button.
To receive the created list to your e-mail you should click the Save button at the top of the black panel and specify the name of your filter for example All visited sites and choose the way you want to get reports, if you check the box “Display and send notifications about new facts.”, you will receive reports in HTML every time whet the filter is triggered. If you choose one of the periods DailyWeeklyMonthly, you will receive reports in your mail box as PDF-attachments
After saving the filter you will get a test report with the stated filters.
Создание дополнительного администратора системы
Open Admin menu and set the required permissions.
You can find more details in the article Administrators.
For example you need to hide the Admin menu, restrict access to list of users and give access to the entire tree of filters. For that perform the following actions:
- Open Admin -> Control panel -> Administrators.
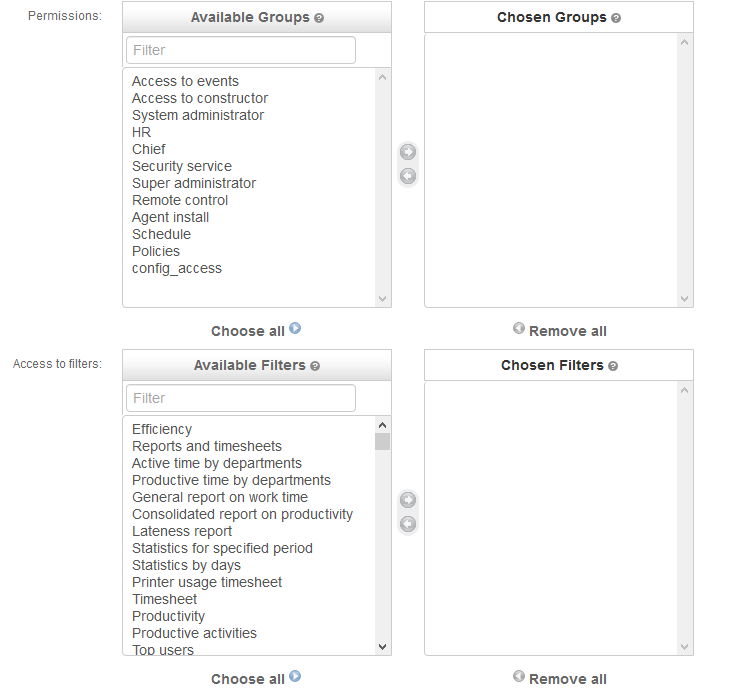
- Set permissions for the new account:
Permissions: Active
Groups: Access to events and Access to constructor.
Filters: all the filters must be in the column Available:
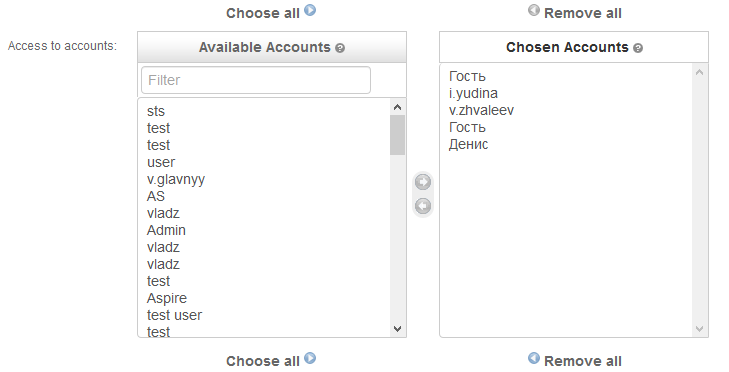
Accounts: transfer users from the column Available: to the column Chosen:, which can be seen by the user of admin panel.
The result should be similar to that on the picture
Note
If you add at least one filter to the Chosen: column, then users in Constructor won’t be displayed at the moment of sign in the account, to view facts on them, you should open the Filters tab and choose the filter assigned to the account.