Remote installation with the Windows-agent installer
Fits for installing an agent within a Windows workgroup or Active Directory. To successfully install agents on workstations you need to perform the following steps:
Download agent
To begin installation you need to download the installer and the tool for remote installation.
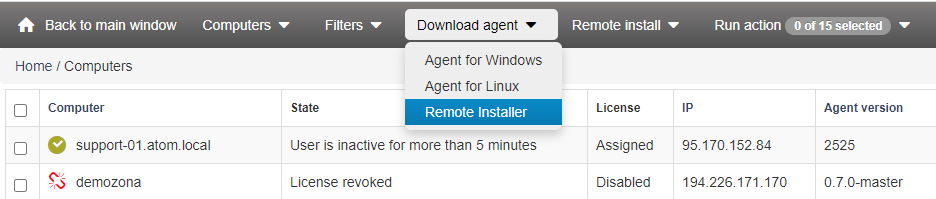
Open admin interface of StaffСop Enterprise, input the IP-address of your server into the address bar of your browser and download an agent installer following the link in the menu of top-right panel Control panel -> Computers:
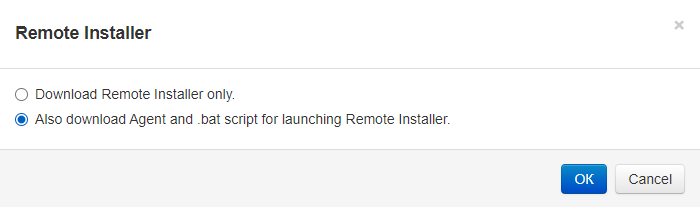
You will be offered two downloading options: 1. Download Remote Installer only. 2. Also download Agent and .bat script for launching Remote Installer. Choose the second option.
Prepare workstations for agent installation
You require administrator permissions for remote computers.
Make sure that ports 135, 139 and 445 are not blocked on agent computer. They are required for copying files by SMB protocol. Perhaps, range of ports 49152-65535 must be also available.
Make sure that ADMIN$ network resource can be accessed.
Settings for Windows XP
Make sure that ADMIN$ network resource can be accessed. Then in Explorer open tab “Service/Properties/View” disable “use simple file sharing”.

If you connect from Windows 8+ then on the host you should enable “Common access to SMB 1.0 - Client SMB 1.0”
Add required PCs to the installation list
Launch InstallerUI-en.bat. Follow the hints.
Warning
Agents of versions previous to 5.8.2498 can’t be installed with the help of this tool.
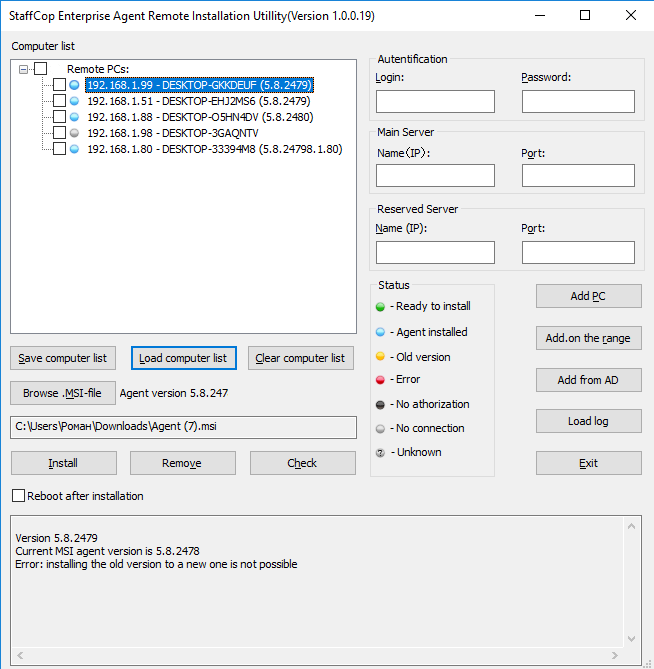
Remote Installation Utility will open:
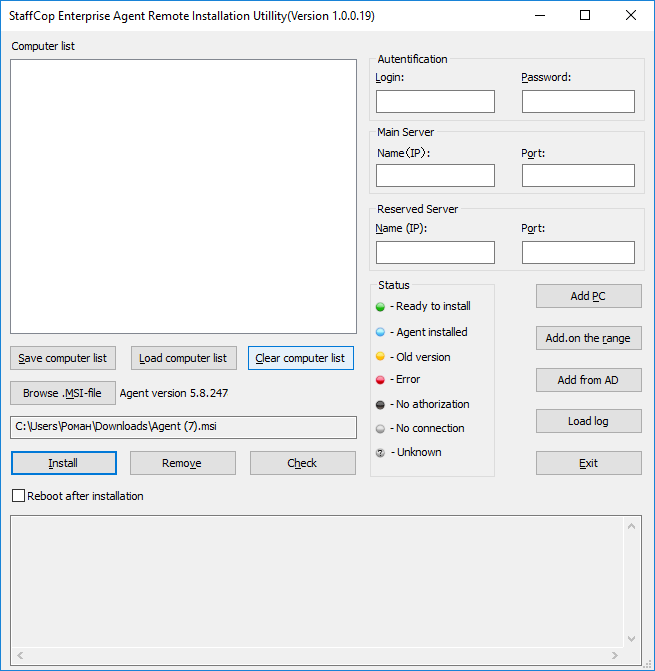
There are the following options:
Main window;
Add by range;
Add computer;
Add from AD.
The first three options support the following login types:
LA (Local Account) - to connect without domain, name as username.
UPN (AD User Principle Name) - to connect within domain, name as username@domain.
SAM (AD SamAccountName) - to connect within domain, name as domain/username.
For option “Add from AD” only UPN and SAM formats are supported. To get more information anout UPN and SAM formats and the difference between them, refer the documentation about main attributes of Active Directory.
There are several possible ways to select computers meant for installation:
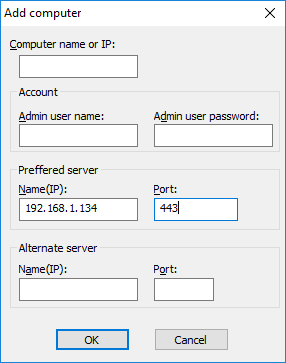
The first way. Add the names or IP-addresses of the computers manually: click the “Add computer” button and input the name or IP-address of a computer, filling in the obligatory fields.
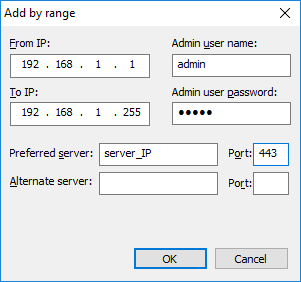
The second way. Specify the range of IP-addresses: click the “Add by range” button and specify the beginning and the end of the range for IP-addresses to scan the network for agents installation, filling in the obligatory fields.
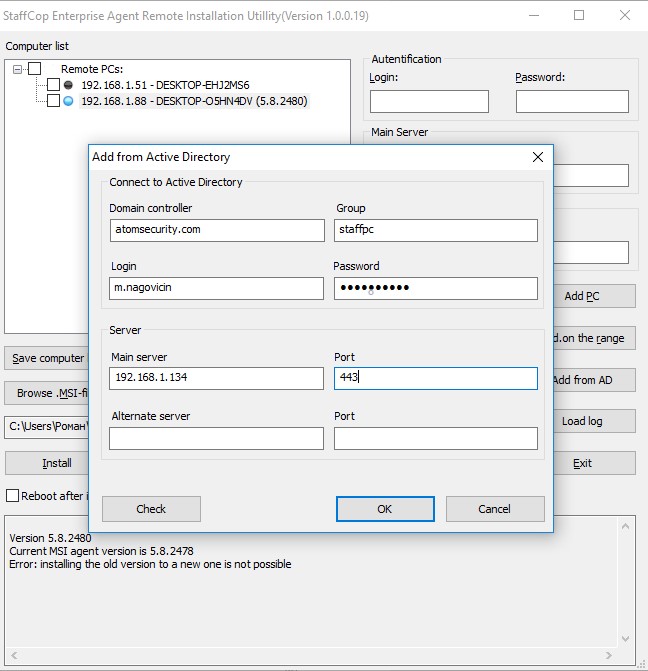
The third way. Add the name of the PCs from the Active Directory group by clicking the “Add from AD” button.
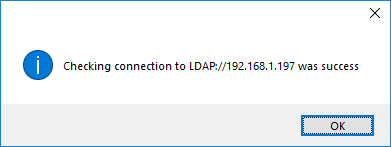
You can check the input data by clicking Check, if the parameters are set correctly you will see the notification about the successful connection to AD.
To use the third way of adding PC names to the list for installation from AD - we recommend to configure AD in the following way:
Create a separate user group in AD
Add required users to the created group
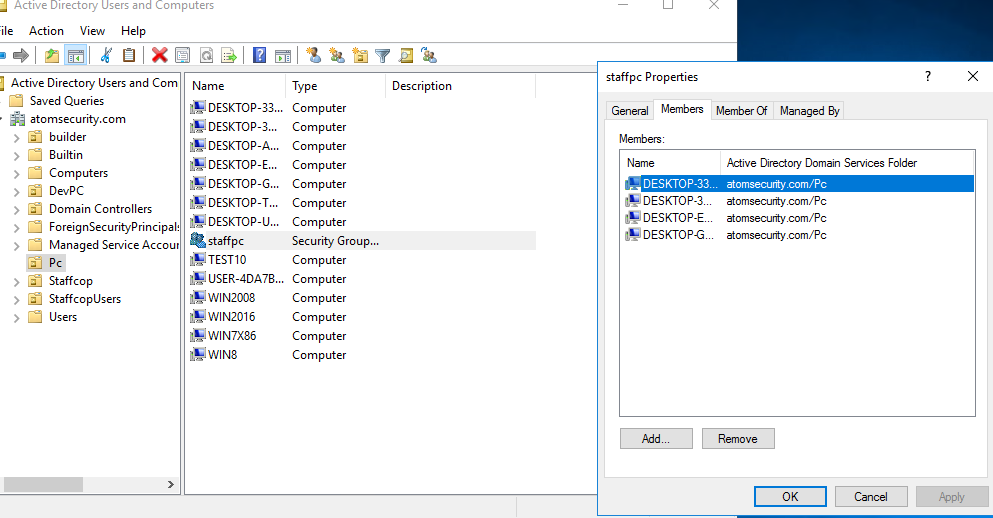
In the remote installer, in the example above, the group name is staffcop_safety_group, that’s why we specify the name of this group in the field of adding new PCs to the list for installation.
Note
If you don’t specify group name the installer will try to open all possible names of PCs in the specified AD by the group name “Domain computers”. If the resulting list of PCs is empty, try to specify a correct AD group and make one more try to connect to AD.
After clicking OK all computer names should be displayed in the list of computers for installation.

You can mark out the required computers for StaffCop agent installation.
Note
“Black”, “Red” and “Grey” statuses displayed near computer names mean that StaffCop agent can’t be installed/uninstalled.
After clicking Install the installation on the specified computers will begin
After completion of installation you will see the corresponding dialog and all the installed agents will refresh their statuses and start sending data to the StaffCop Server.
As an option, we recommend you to save the list of the scanned computers to a separate file.
If you need to get installation logs select the required computers in the installer and click Export logs.
Check installation
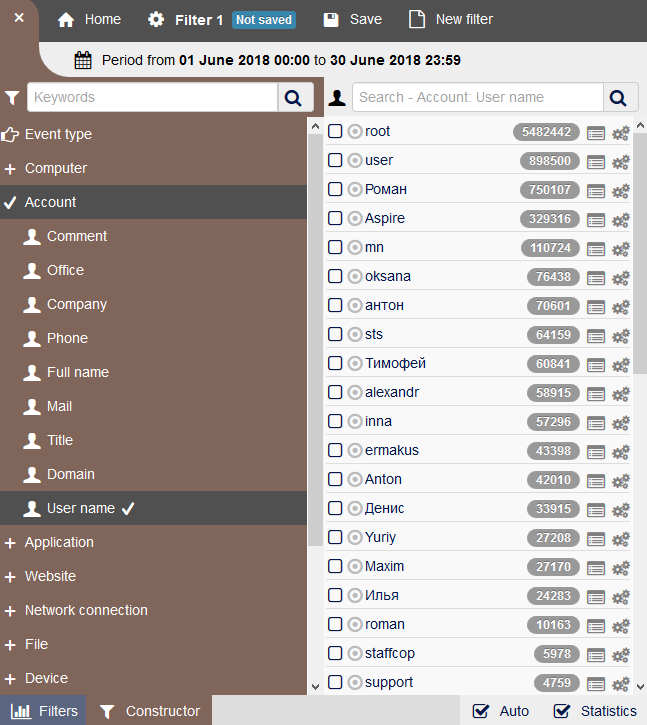
If everything is fine and the agents have received configurations from the StaffCop Server then after refreshing of the admin interface you should see the data received from your agents.
Remote uninstallation
The first way
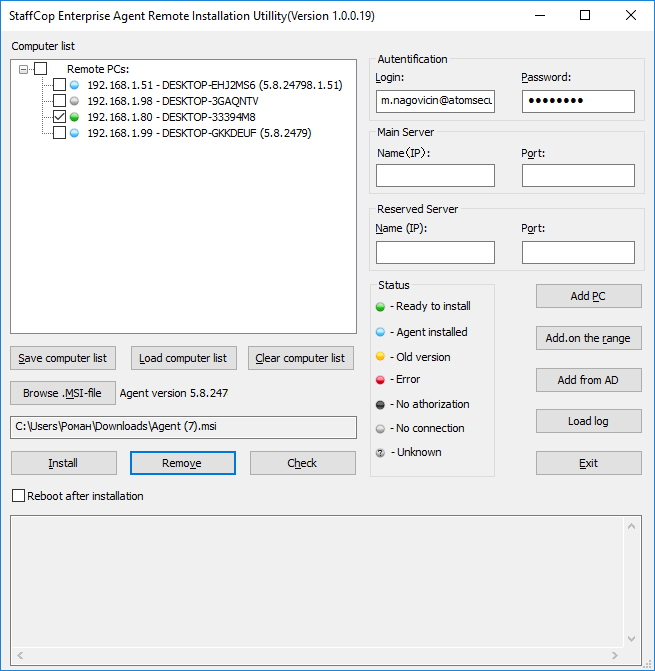
In a similar way the remote installer can be used to call mass or single uninstallation of agents.
For that you should upload the installation list that was previously saved or start another scanning of the system.
In the list of computers, choose those you want to remove and click Remove.
Some time after the of installation you can start another network scanning to make sure that the agents are removed from the chosen computers and the icon near the workstation appears green, which means the system has the agent uninstalled.
The second way
You can uninstall agent from Control panel - Control panel -> Computers -> Run action -> (select required computers) -> Call uninstall.
Troubleshooting
If you meet any questions or troubles concerning the remote installation of agents, you should contact our technical department and follow the recommendations of our team.