Open network sharing for agent installation
Note
If you use Active Directory you should try remote installation with AD with rights of the domain controllers skipping the steps described in this article.
If you use centralized managing of the policies of antivirus software you should perform centralized changing of these policies.
We didn’t change any default parameters of the network card, in other words we didn’t uncheck any boxes in the network parameters.
We didn’t change the local security policy on the PC.
We didn’t turn off the Windows firewall
To make the remote installer work we should perform the following actions on the client PC:
add user with the help of control userpasswords2;
open the network sharing for C: drive in Windows File Explorer;
run the command for making changes in the Windows registry and permitting the user to perform commands through the network:
reg add HKLM\SOFTWARE\Microsoft\Windows\CurrentVersion\Policies\system /v LocalAccountTokenFilterPolicy /t REG_DWORD /d 1 /f
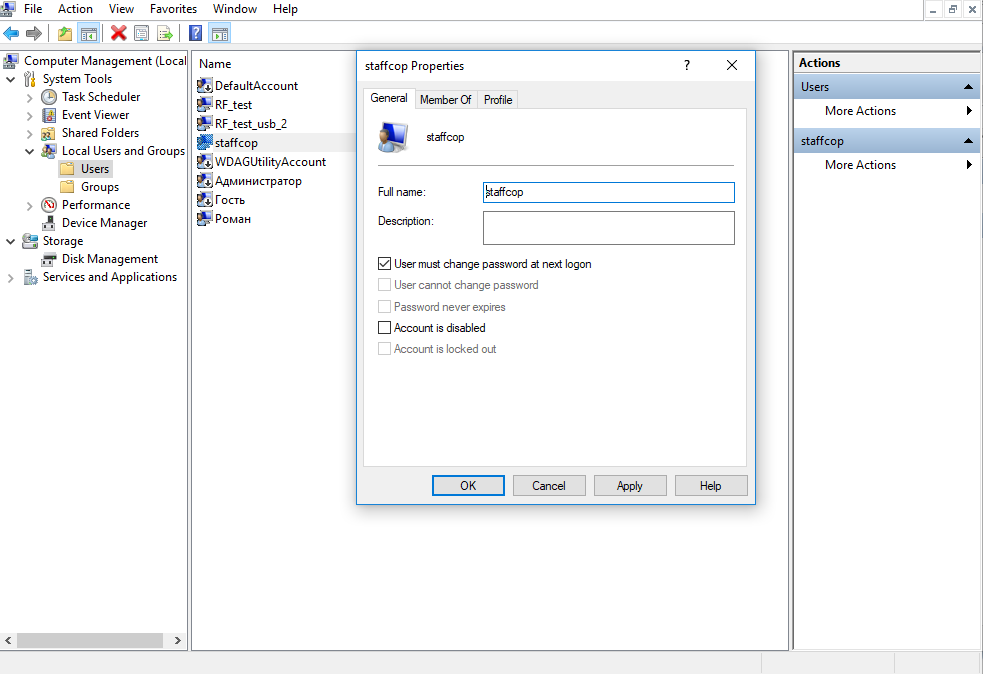
Enter the user’s computer and launch the command line interface - Start - Programs -Service - Windows -CMD, click CMD with the right button and choose - Run as administrator, run the command control userpasswords2 and in the open window\master add a local user, for example with the name staffcop and password 2wsxCDE#, the role in the system on the second tab Group membership specify the group - Administrator.
Don’t close the command prompt yet!
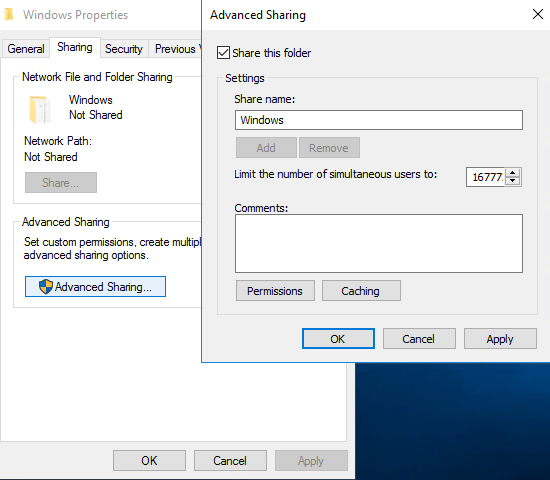
To open network sharing for the hard drive for the user open My Computer and click drive C:\ with the right mouse button, and on the tab Access click Extended settings and open access by clicking Apply.
To give our user the ability to work with the remote access we must allow performing these actions in the local security policies, to do that we must run the command for adding parameters in the system registry.
Switch to the command line interface run “as administrator” and run command:
reg add HKLM\SOFTWARE\Microsoft\Windows\CurrentVersion\Policies\system /v LocalAccountTokenFilterPolicy /t REG_DWORD /d 1 /f
Accept changes
Now the workstation is ready for StaffCop Agent installation.
From now on if we repeat the scanning of the computers in the network and input the login and password stated above, this workstation should appear on the list of the computers wher agents can be installed.
Note
The test was successfully perfromed on Windows10 x64, Windows 7 x64, Windows 8.1 x64 with the latest updates. A reboot of the workstation may be required for the agent to work correctly.