Filter properties
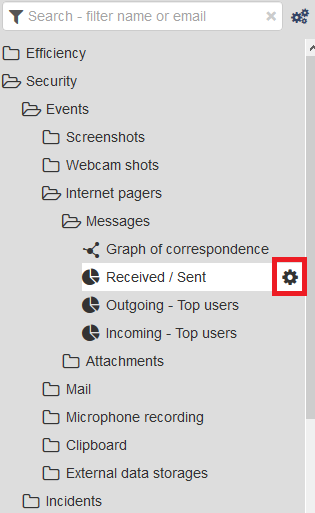
To open Filter properties click the cogwheel icon near the required filter.
Properties - specify the filter name. If it is a policy, you will see the settings for policy activation. If the policy is enabled it will be displayed in “Constructor -> Triggered filters”. You can choose the productivity category of the filter. For dictionaries you can also set the ability to search for the specified keywords or word phrases. For dashboards you can choose several filters to be included.
Notifications - here one can set up notifications on filter events, or scheduled reports in PDF format. Empty reports sending can be disabled. Several e-mail addresses can be stated as the recipients in the corresponding field, in column without any separators.
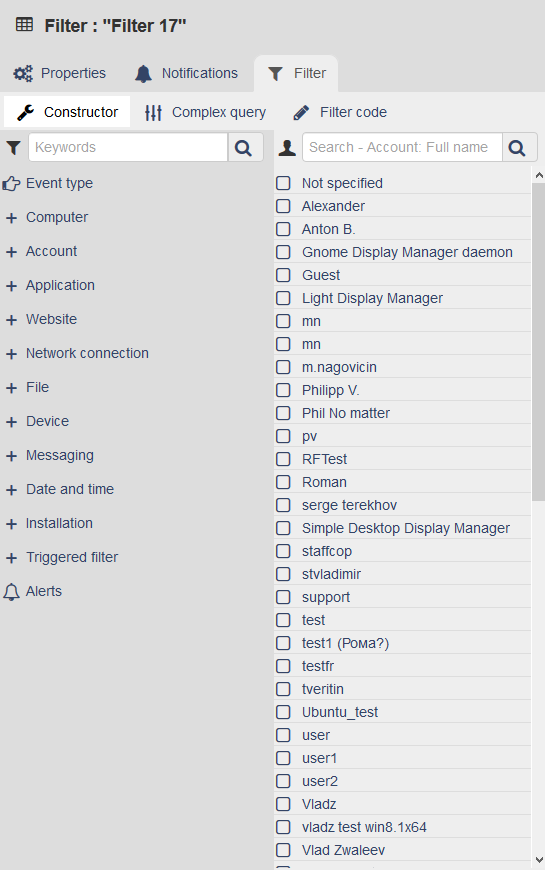
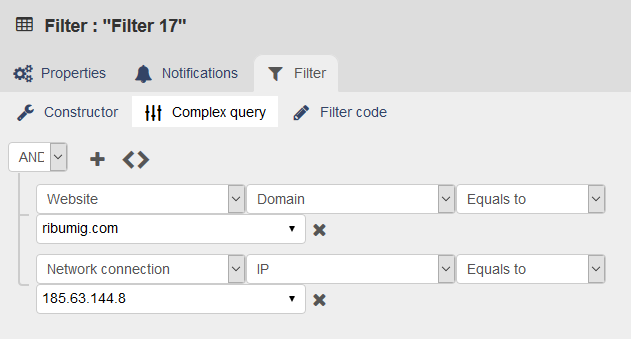
Filter - here one can configure the filter by adding event types directly by chosen dimensions. It’s possible to create a Complex request - set filtration parameters using logical operators AND, OR.
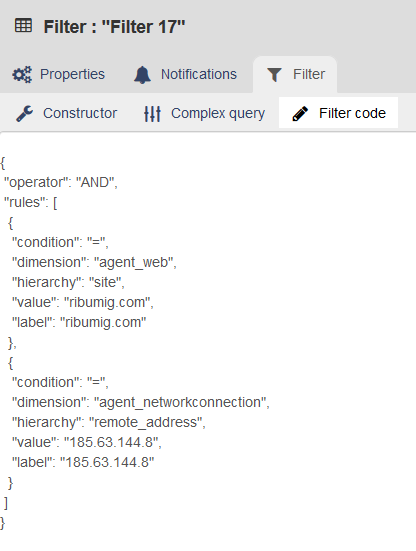
Filter code - represents a text editor displaying the filter parameters in the text form consisting of a tag (for example: agent_application@app_name:app_name), assignment operator „=“ and values of filter parameters (e.g. chrome.exe).
Properties
Title - filter name.
Policy is enabled - policy starts working and mark events with the specified productivity category or as incidents.
Search by dictionary - used for displaying only events containing words from Dictionary.
Category - allows to choose productivity category to be displayed in Time tracking reports in the corresponding color.

Premium, Productive - filters with one of these categories display useful activity of employees.

Neutral - filters with this category display neutral activity of employees.

Unproductive, Incident - filters with one of these categories display useless or harmful activity of employees.
Notifications
Activate notifications - enable sending of reports or notifications
Regularity - choose the period of sending notifications or reports.
Dispatch time - specify the exact time of report sending.
HTML - HTML report format.
PDF - PDF report format (as attachment).
Split by users - the report will be displayed separately for each user.
Send only if there is data - don’t send empty reports.
Send by mail - if this parameter is not checked the report will not be sent, instead, an incident will be created and available in “Admin -> Incidents**.
To - common field for specifying the list of recipients of reports and notifications. Can be filled in with the help of “Addresses”.
Save report to disk - the report will be saved in PDF format and available in “Control panel -> Files”.
Note
A preliminary configuring of mail server is required in Mail server settings. For detailed information read the article Mail server settings.
Note
You can restrict the circle of Administrators with access to this filter. In this case the report and data will be displayed only to the chosen Administrator profiles.
Filter
Constructor - allows to choose filtering dimensions.
Complex request - allows to set filtration parameters using logical operators AND, OR.
Filter code - represents a text editor displaying the filter paramaters in the text form consisting of a tag (for example: agent_application@app_name:app_name), assignment operator „=“ and values of filter parameters (e.g. chrome.exe).
Delete filter
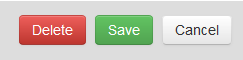
To delete a filter, switch to the “Filters” tab and click the cogwheel icon near the required filter. Then click “Delete”. When the dialog window “Confirmation - Execute action?” appears, choose “Yes”. The chosen filter will be deleted.