Change StaffCop Server IP
Automatic change of IP-address on Ubuntu 18.04
wget dist.staffcop.ru/utils/dinamic-to-static-ip.sh
sudo bash dinamic-to-static-ip.sh
The current dynamic IP address will be assigned to your machine as static. Which means that the automatic way keeps the address unchanged.
If you want to immediately assign an address to your server, enter this address separated by a space after the name of the script, for example:
sudo bash dinamic-to-static-ip.sh 192.168.1.132
Manual change of IP-address on Ubuntu 18.04
Warning
The following steps are relevant for only for the version 4.7 and higher versions.
StaffCop Enterprise 4.7 is based on Ubuntu 18.04 LTS in which assigning static addresses with the script ifupdown (editing the file /etc/network/interfaces) is no longer supported. In this OS netplan tool is used for assigning static IP-address of the server.
All the settings of netplan are configured only with root rights. For this you should enter the root mode by running sudo su -, entering the password of a common user:
sudo su
When the system is installed you should define which file contains the current configuration. To do that use ls command to check the content of the directory /etc/netplan:
ls /etc/netplan

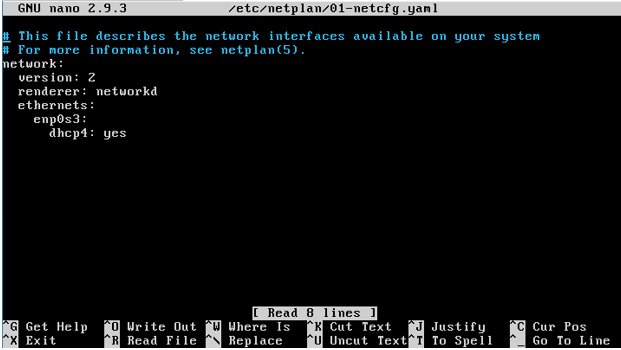
We can see that the current configuration is loacated in the file 01-netcfg.yaml. Run nano text editor with the name of this file as an argument:
nano /etc/netplan/01-netcfg.yaml
Editor will open.
Make corrections as shown on the screenshot:
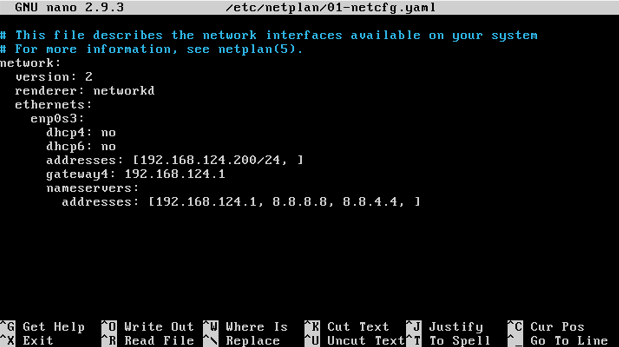
Change 192.168.124.200 in the first line of addresses to the address of your server, change mask /24 (corresponds to 255.255.255.0, if you have the same mask - don’t change it) to your mask, change 192.168.124.1 in the line gateway4 to the address of your gateway, change DNS-servers in the second line of addresses to your DNS-servers. Leave at least one empty line at the end of the file.
Then press Ctrl-X (exit the editing mode). The editor will request saving of the changes to the file:
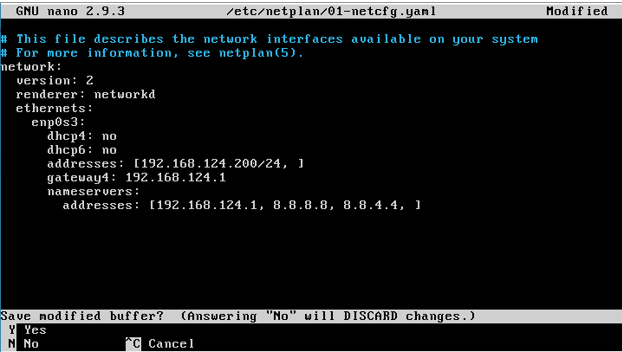
Answer Yes (“y”) to this request. The editor will suggest file name for saving. Agree by clicking Enter.
Check the results
netplan apply
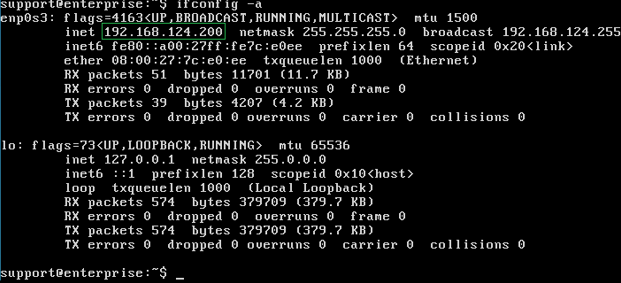
If the output doesn’t contain any errors, it means all is correct. To be sure, reboot the system with the command reboot and check the current IP-address:
ifconfig -a
Automatic change of IP-address on Ubuntu 16.04
wget dist.staffcop.ru/utils/dinamic-to-static-ip.sh
sudo bash dinamic-to-static-ip.sh
The current dynamic IP address will be assigned to your machine as static. Which means that the automatic way keeps the address unchanged.
If you want to immediately assign an address to your server, enter this address separated by a space after the name of the script, for example:
sudo bash dinamic-to-static-ip.sh 192.168.1.132
Manual change of IP-address on Ubuntu 16.04
This is done in a usual way: edit the configuration file and restart the service.
You must specify the following:
Interface name of eth0 (may be different, use ifconfig)
Subnet mask
Computer IP
Default gateway
open the file in a text editor:
sudo nano /etc/network/interfaces
mark out two lines (put a # sign in front of them)
#auto eth0
#iface eth0 inet dhcp
It’s better to mark out lines, not delete them, because if you are reading this guide, then you are new to configuring the network in Linux and you can forget exactly what you need to enter if you suddenly need to return to dhcp method.
and write the following:
auto eth0
iface eth0 inet static
address 192.168.1.125
netmask 255.255.255.0
gateway 192.168.201.254
dns-nameservers 8.8.8.8 192.168.201.254
Our interface turns on automatically when starting
The type of IP address and the method of assignment, which means static assignment
IP address
Subnet mask.
The address of your gateway, that is, a router or Internet access point.
Then, 2 DNS servers are listed, one of which is a Google name server, and the second is located on the local network at 192.168.201.254. Your local DNS server can be checked with the network system administrator or peeped in the settings of the network card of the working machine with windows.
For the changes to take effect, restart the interface.
sudo /etc/init.d/networking restart
Or restart the entire virtual or physical machine
sudo reboot