Add/remove partitions
Let’s take an the example of working with real partitions on a Linux-based OS. In case of a virtual system installed on a virtual machine like VirtualBox, all actions and commands are identical.
General concepts
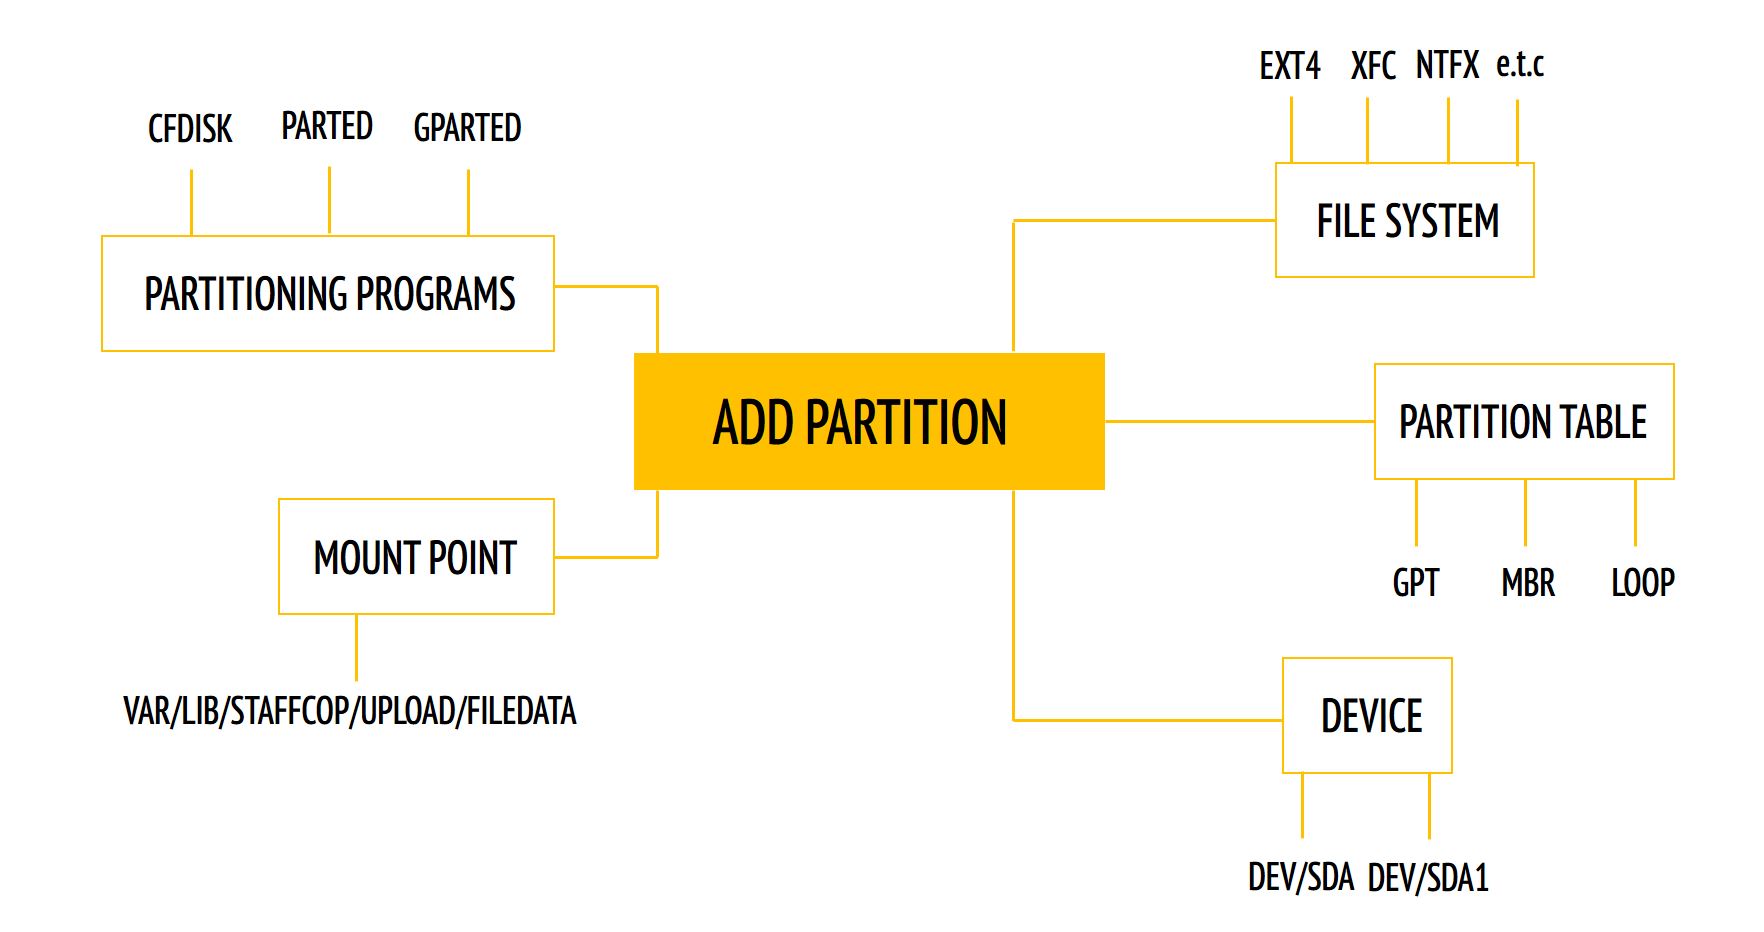
Partitioning programs - software for hard disk partitioning.
Mount point - a directory in which the contents of the device, for example, a hard disk, will be displayed.
Device - any device, whether it is a hard disk, a flash drive, a CD or something else, is represented as a file in Linux. This is usually displayed in the/dev/sda style.
Partition table - the partition table stores information about the type of partition and its location on the hard disk.
File system - information about the file system of the partition.
Overview
Warning
Be careful with the following operations. They permanently remove information on the disk. If you make a mistake and choose the wrong hard drive, you will lose the data accumulated there.
Note
If it’s more convenient for you to work with the graphical interface, you can download Live-CD Gparted, boot from it, and split the disk the way you need.
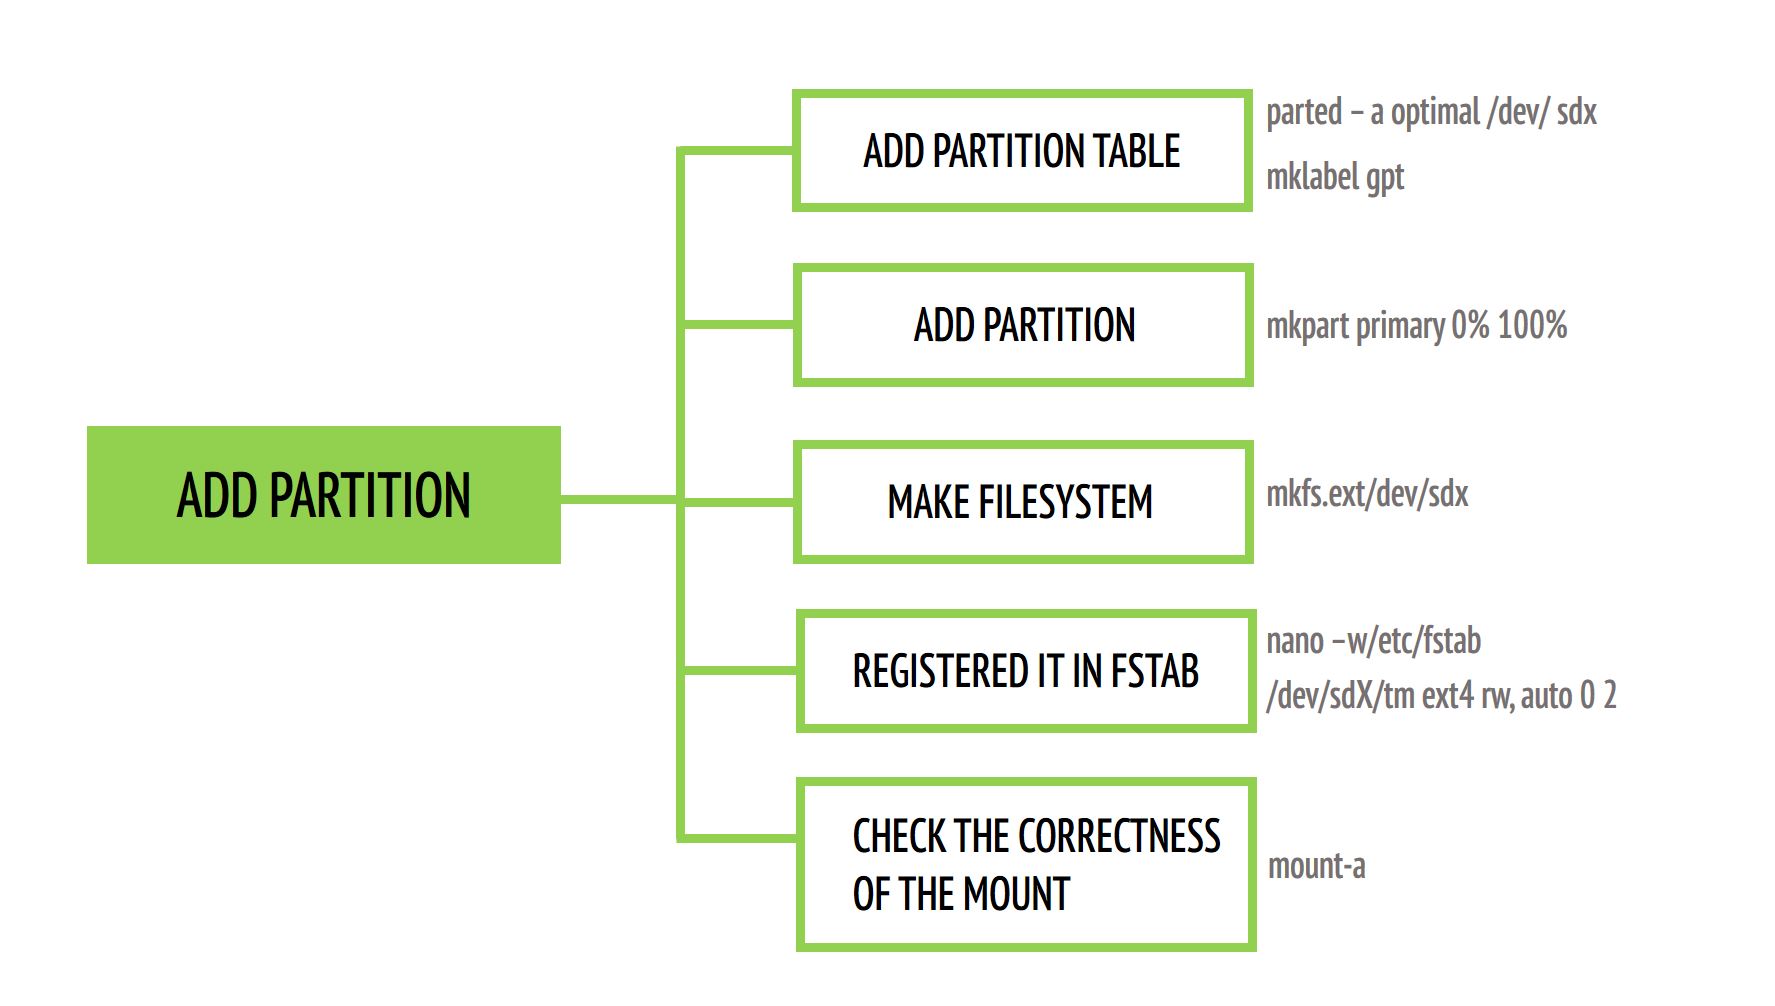
Select the device (hard disk) for partitioning with the command:
sudo parted -a optimal /dev/sdX
We enter the command line interface of the program.
Create a partition table with the command of the type
mklabel gpt
Note
because we are already in the text interface of the “parted” command, running as root, we don’t need to enter sudo.
Create a partition with the command
mkpart primary 0% 100%
This means that we create a single partition, which will occupy the entire disk, from the beginning to the end, and it is the primary partition. If you need a partition to occupy only a part of the disk, you can change the beginning or the end of the partition.
Create a file system
For linux, there are several types of file systems, the default is ext4. If you do not have a clear idea of what the strengths and weaknesses of each file system are, then the best choice would be to use ext4. It is created by the command
sudo mkfs.ext4 /dev/sdX
Register the device in/etc/fstab, so that it is automatically mounted at every boot.
The line will look something like this:
/dev/sdX /folder ext4 rw,auto 0 2
Check the correctness of the mount with the command
sudo mount -a
This command mounts all devices listed in /etc/fstab, but not mounted.
Resizing partitions
Sometimes you need to resize a partition.
To do this, you have several options that goes out from the basic requirement: the partition to be changed must be unmounted.
umount /dev/sdX.
Then we can run parted and resize the partition.
sudo parted /dev/sdX
resizepart №part 100%
This command will stretch the partition to the entire free disk space, provided that it is available.
Note
Keep in mind that any partition operations are potentially dangerous, and compromise the integrity of your data on the partition being modified.
The disk is enlarged, but if we do not perform the next step, a new place will not be available for our system.
Additionally, you need to exit parted and execute the command.
sudo resize2fs /dev/sdX
After modifying a partition, it is reasonable to check it.
sudo fsck.ext4 -f /dev/sdX
Warning
Do not run fsck on the mounted partition! This can lead to data loss.
Also, to resize a partition, you can boot from livecd with gparted, and get a graphical interface for working with your partitions.
You can also use the installation CD of most modern Linux distributions, for example, gentoo as a live-cd.
There are no graphical interface, but parted is there.